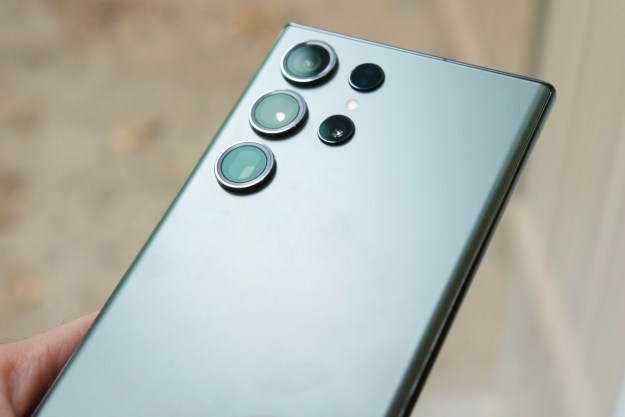
It’s been about two years since the release of the Samsung Galaxy S9 and S9 Plus. You may think you’ve seen everything there is to see on the humble Galaxy S9, but chances are, you probably haven’t explored all the features that the phones have to offer. While some things may not have changed much from the Samsung Galaxy S8, there are still plenty of new surprises that will surely enhance your mobile experience.
- How to use Adapt Sound
- How to use the blue light filter
- How to use AR Emoji
- How to use Bixby Vision
- How to use Super Slow-Motion video
- How to set up Intelligent Scan
- How to set up Secure Folder
- How to use Samsung Pass
- How to customize your home screen
- How to customize the always-on display and lock screen
- How to use Live Focus
- How to disable or remap the Bixby button
- How to customize Quick Settings Tiles
- How to change the Navigation bar
- How to hide apps
- How to set up Do Not Disturb
- How to turn on Dual Messenger
Whether you just bought the phone or you’re looking to give it some new life, check out these tips and tricks for the
How to use Adapt Sound


To get the best wired and wireless headphone experience with your Galaxy S9, try Adapt Sound. The built-in tool measures the frequency levels of your headphones by giving you an audio test. Don’t worry, you won’t have to study for this one.
- Navigate to Adapt Sound by going to your settings > Sounds and vibration > Sound quality and effects > Adapt sound.
- There are presets based on your age, but we recommend creating your own sound profile by tapping Personalize your sound.
- Go to a quiet place because you’re going to be listening for very subtle and low-volume beeps during the test. Put on your headphones and tap Start.
- As you listen for beeps, tap Yes or No to confirm. When you’re finished, tap Save.
Give your favorite song a listen. Your sound and overall audio experience should be improved thanks to the boosted mid and high frequencies.
How to use the blue light filter


We stare at our phones more than ever. To reduce eye strain and get a good night’s rest, turn on a blue light filter. As the name suggests, this filters out the blue lights emitting from your screen, which reduces the strain and burn that it usually leaves from long exposure.
- Open up your quick panel layout by swiping down from the top of your screen.
- Look for Blue light filter or an icon with a B inside a box. You can tap on it to turn it on, but if it’s your first time, you may want to adjust the opacity or strength of the filter.
- To adjust the opacity, tap the Blue light filter text label underneath the icon. The farther right you scroll the opacity bar, the more blue light is filtered.
- To set an automatic schedule for the filter, tap and hold the quick panel icon or Details. You can set it to Sunset to sunrise, or a custom schedule.
How to use AR Emoji
One of the most talked-about features on the Galaxy S9 was the introduction of AR Emoji, which creates emoji customized to your likeness. While it’s definitely not as polished as Animoji on the iPhone with Face ID, it’s a fun option for chatting. While the look of the camera in Samsung’s new One UI has changed, the process is much the same as the video above.
How to use Bixby Vision

While it may be fair to say the Bixby Vision is Samsung’s answer to Google Lens, it’s not quite as polished. With Bixby Vision, you use the camera on your
Right now
While we have an in-depth
- You need to set up Bixby by tapping on the Bixby button on the left side of the phone or by swiping right on the home screen.
- Follow the prompts until you see the Bixby Homepage appear showing Bixby Level 1 at the top.
Now


- When you tap the Bixby Vision icon, you will see the different identification categories appear.
- Tap the appropriate one and then aim the camera at the image in question. You will see different suggestions begin to appear.
- Once you have the item in focus, tap on the category again to see what type of information Bixby Vision offers.
How to use Super Slow-Motion video
Shortly before Samsung unveiled its newest flagship, the company promised the Galaxy S9 would reinvent the camera. Along with a ton of other new camera features on the Galaxy S9, Super Slow-Motion was introduced. With Super Slow-Motion, you can capture video at an incredibly high frame rate (960 fps to be exact), creating Matrix-like video footage.
- To use Super Slow-Motion, you need to open the Camera app.
- Swipe over to the Super Slow-Motion option below the viewfinder. You will be presented with two options: One will allow you to automatically begin recording at the slower frame rate when motion is detected within a small box on the screen, while the other allows you to manually control the image.
- If you select the manual option, just tap the shutter button to begin recording.
- When you’re ready to capture the slow-motion footage, tap the three-button icon. Since the slow-motion footage is less than a second (0.2 seconds to be exact), you may want to press the three-button icon several times to capture footage in the same video.
Should you choose to try out the automatic mode, tap the auto mode at the bottom of the camera and make sure the object you want to capture in slow motion is in the defined box. Press the shutter button to start recording. You will see the box turn yellow when it is about to capture the clip. As with the manual mode, you can initiate slow-motion recording multiple times within the same video.
How to set up Intelligent Scan
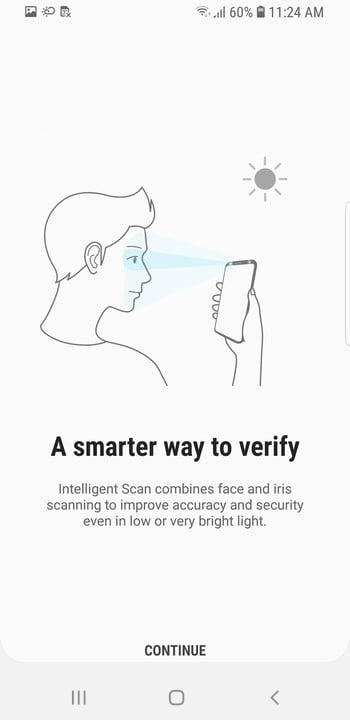
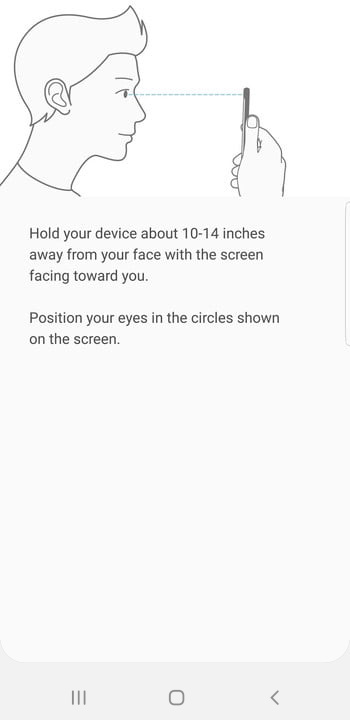
While Samsung did make a number of upgrades to its camera hardware, don’t expect the latest flagship to have a facial identification feature that matches what you find on the iPhone XS. With Samsung’s new Intelligent Scan feature you can unlock your phone using iris and facial data. Be warned, however, that the feature has more than its fair share of hiccups so you may want to set up an alternate authentication method.
- Tap Settings > Biometrics and security > Intelligent Scan.
- Enter your password, PIN, or pattern. Tap Continue.
- Select a lock screen option and then agree to the disclaimer. Press Continue two times.
- First, register your face by holding the phone 8 to 20 inches away and making sure it is centered in the alignment circle. Once registered, tap Continue.
- Finally, register your irises by holding the phone 10 to 14-inches away and making sure each eye is centered in the necessary alignment circles.
To get the best data you’ll want to make sure you’re in a well-lit room without a lot of backlight. You also need to remove your glasses for the iris scan, and once set up you may not be able to authenticate with them on.
How to set up Secure Folder


If you have sensitive documents or photos you don’t want to share with everyone, the
Setting up Secure Folder takes seconds.
- Tap Settings > Biometrics and security > Secure Folder. Press Next > Start.
- Sign in to your Samsung account and tap Confirm.
Next, you need to choose the best authentication method to access Secure Folder. If you’re using a PIN, password, or pattern to authenticate, you probably want to select something different than what you use to access your phone. Once you’ve entered your preferred authentication method, a Secure Folder will be set up and added to your home screen.
To use Secure Folder, simply tap the homepage icon. You’ll see options to add photos, apps, and files.
How to use Samsung Pass
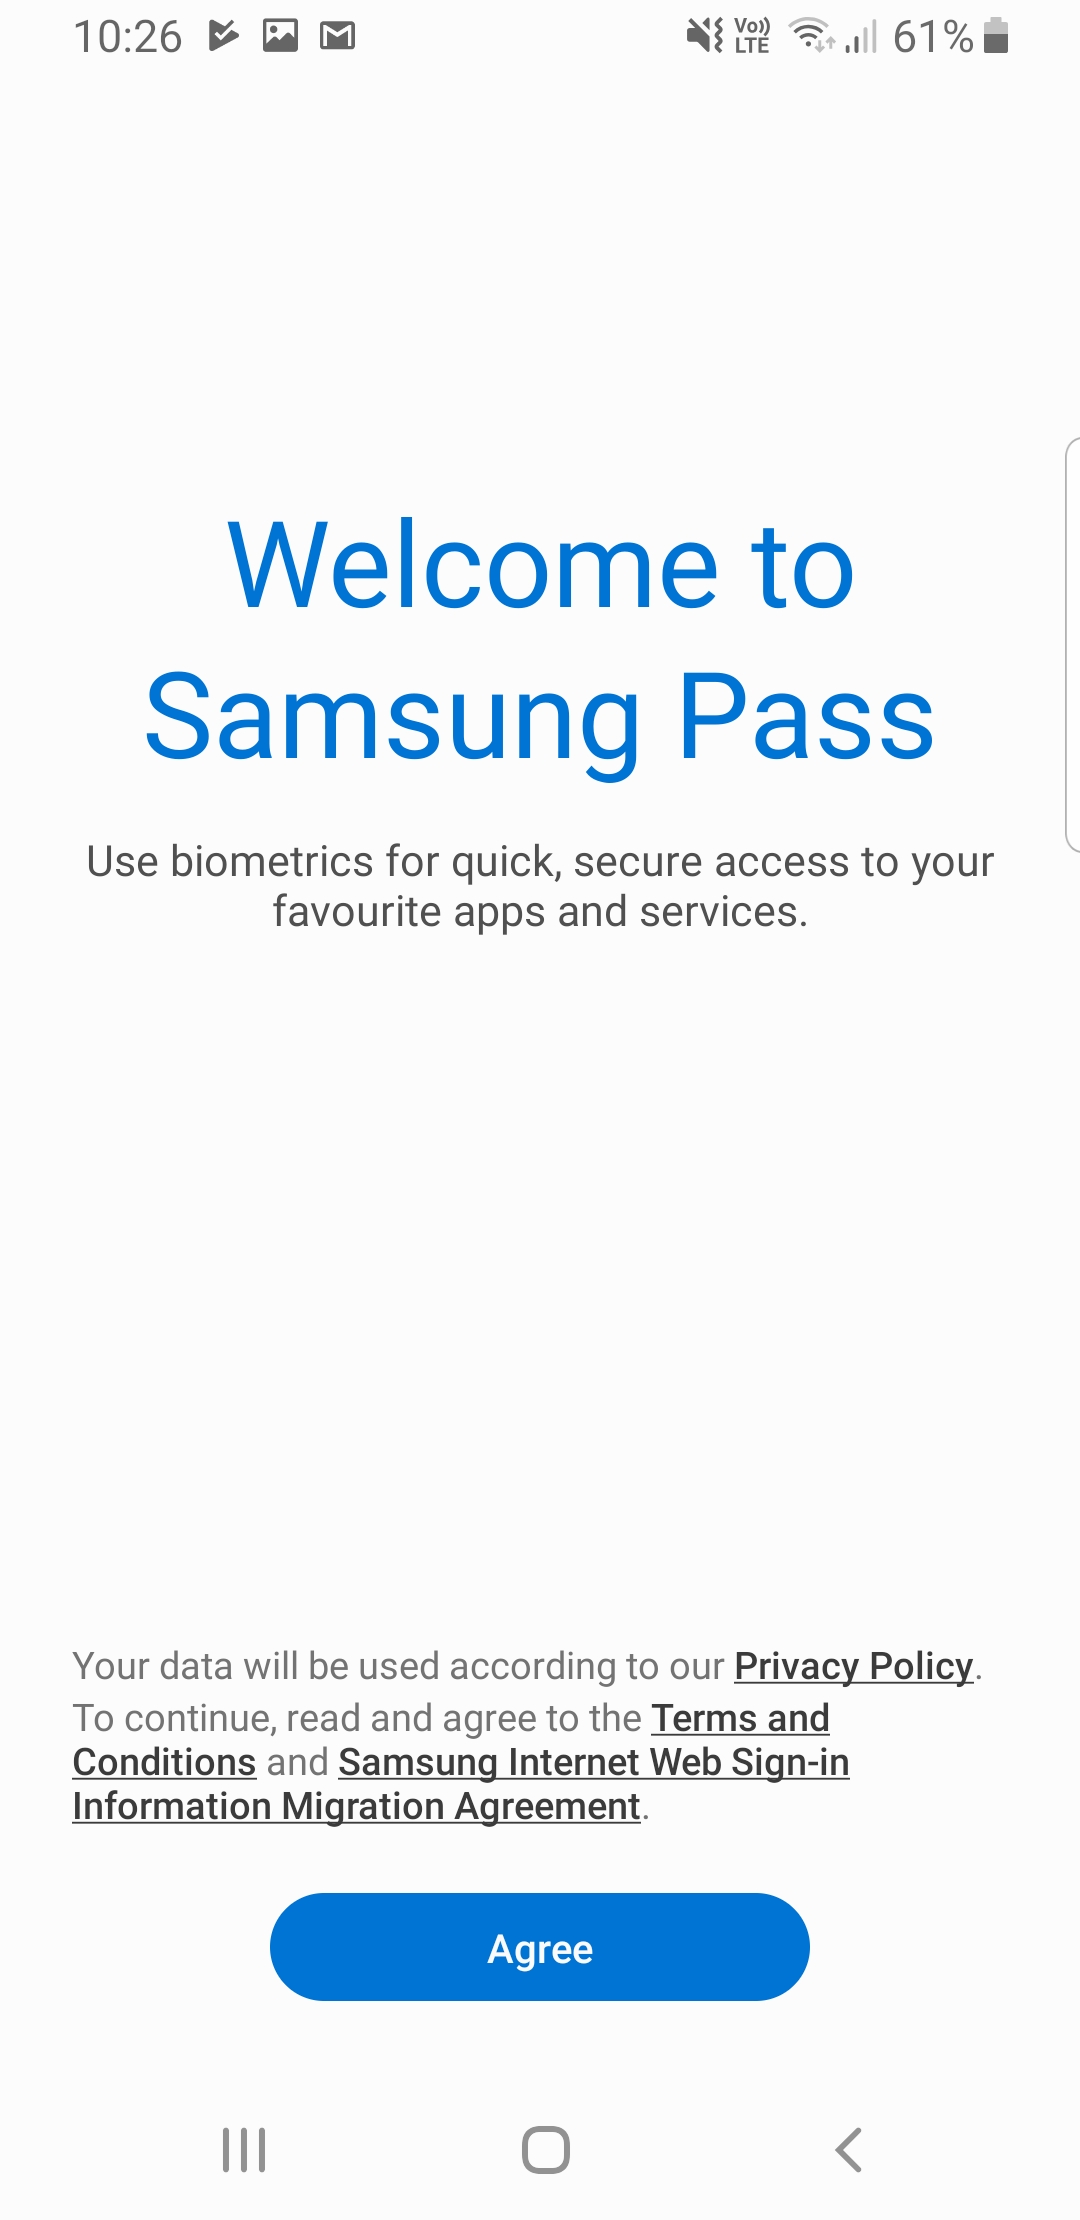
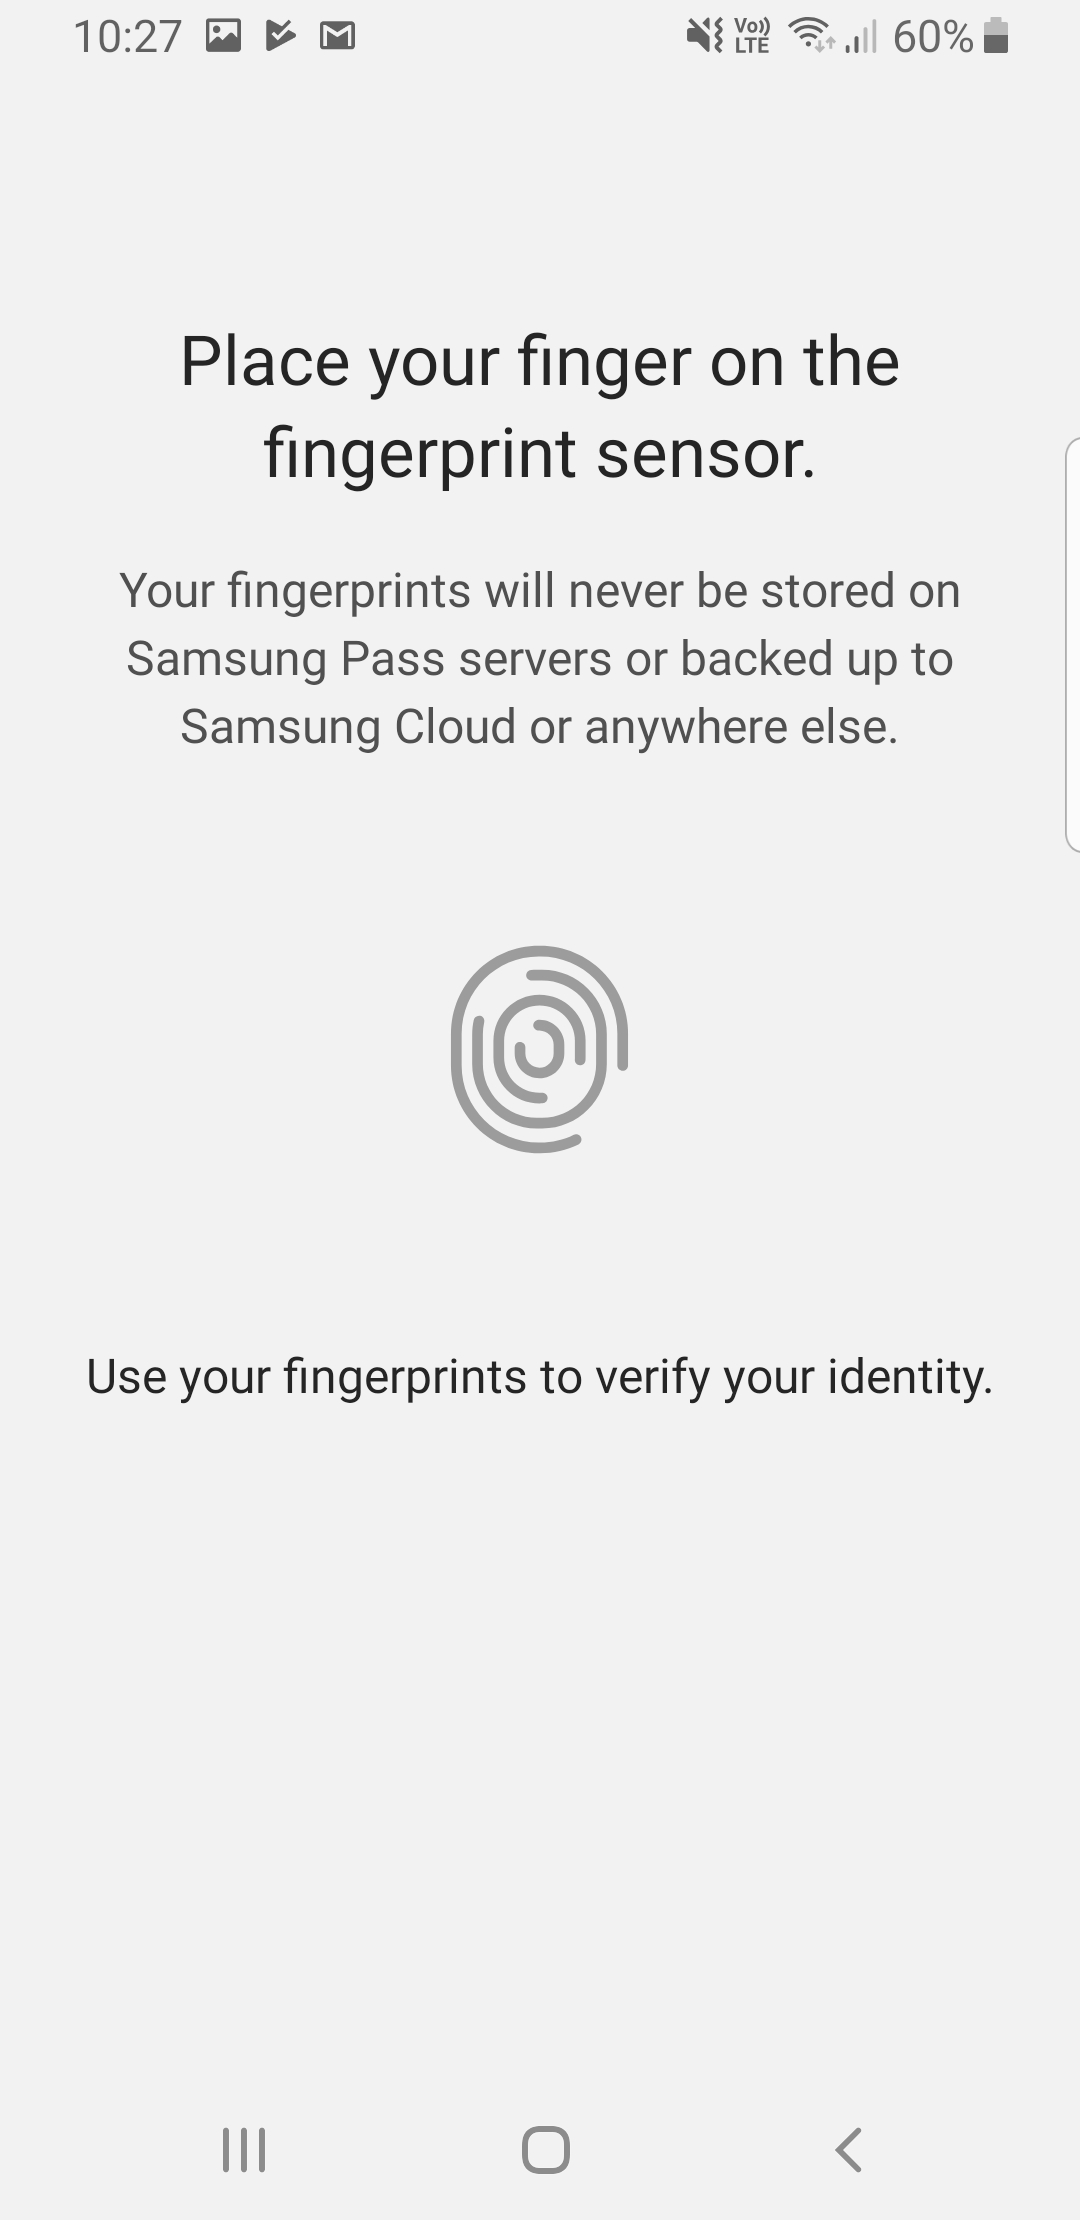

Samsung Pass allows you to auto-populate personal details such as your name and email address. Sure, Google provides a similar feature with autofill, but Samsung Pass works in the native internet browser.
- Go to Settings > Biometrics and security > Samsung Pass.
- Tap Next. Sign in with your Samsung Account and press Start. Agree to the disclaimer and tap Next.
- Finally, choose your preferred biometric identification option.
Each time you use Samsung’s browser to sign in on websites or enter personal information, it will be saved to Samsung Pass for future use. When you want to use the information stored in Samsung Pass, just authenticate using an iris scan or fingerprint.
How to customize your home screen
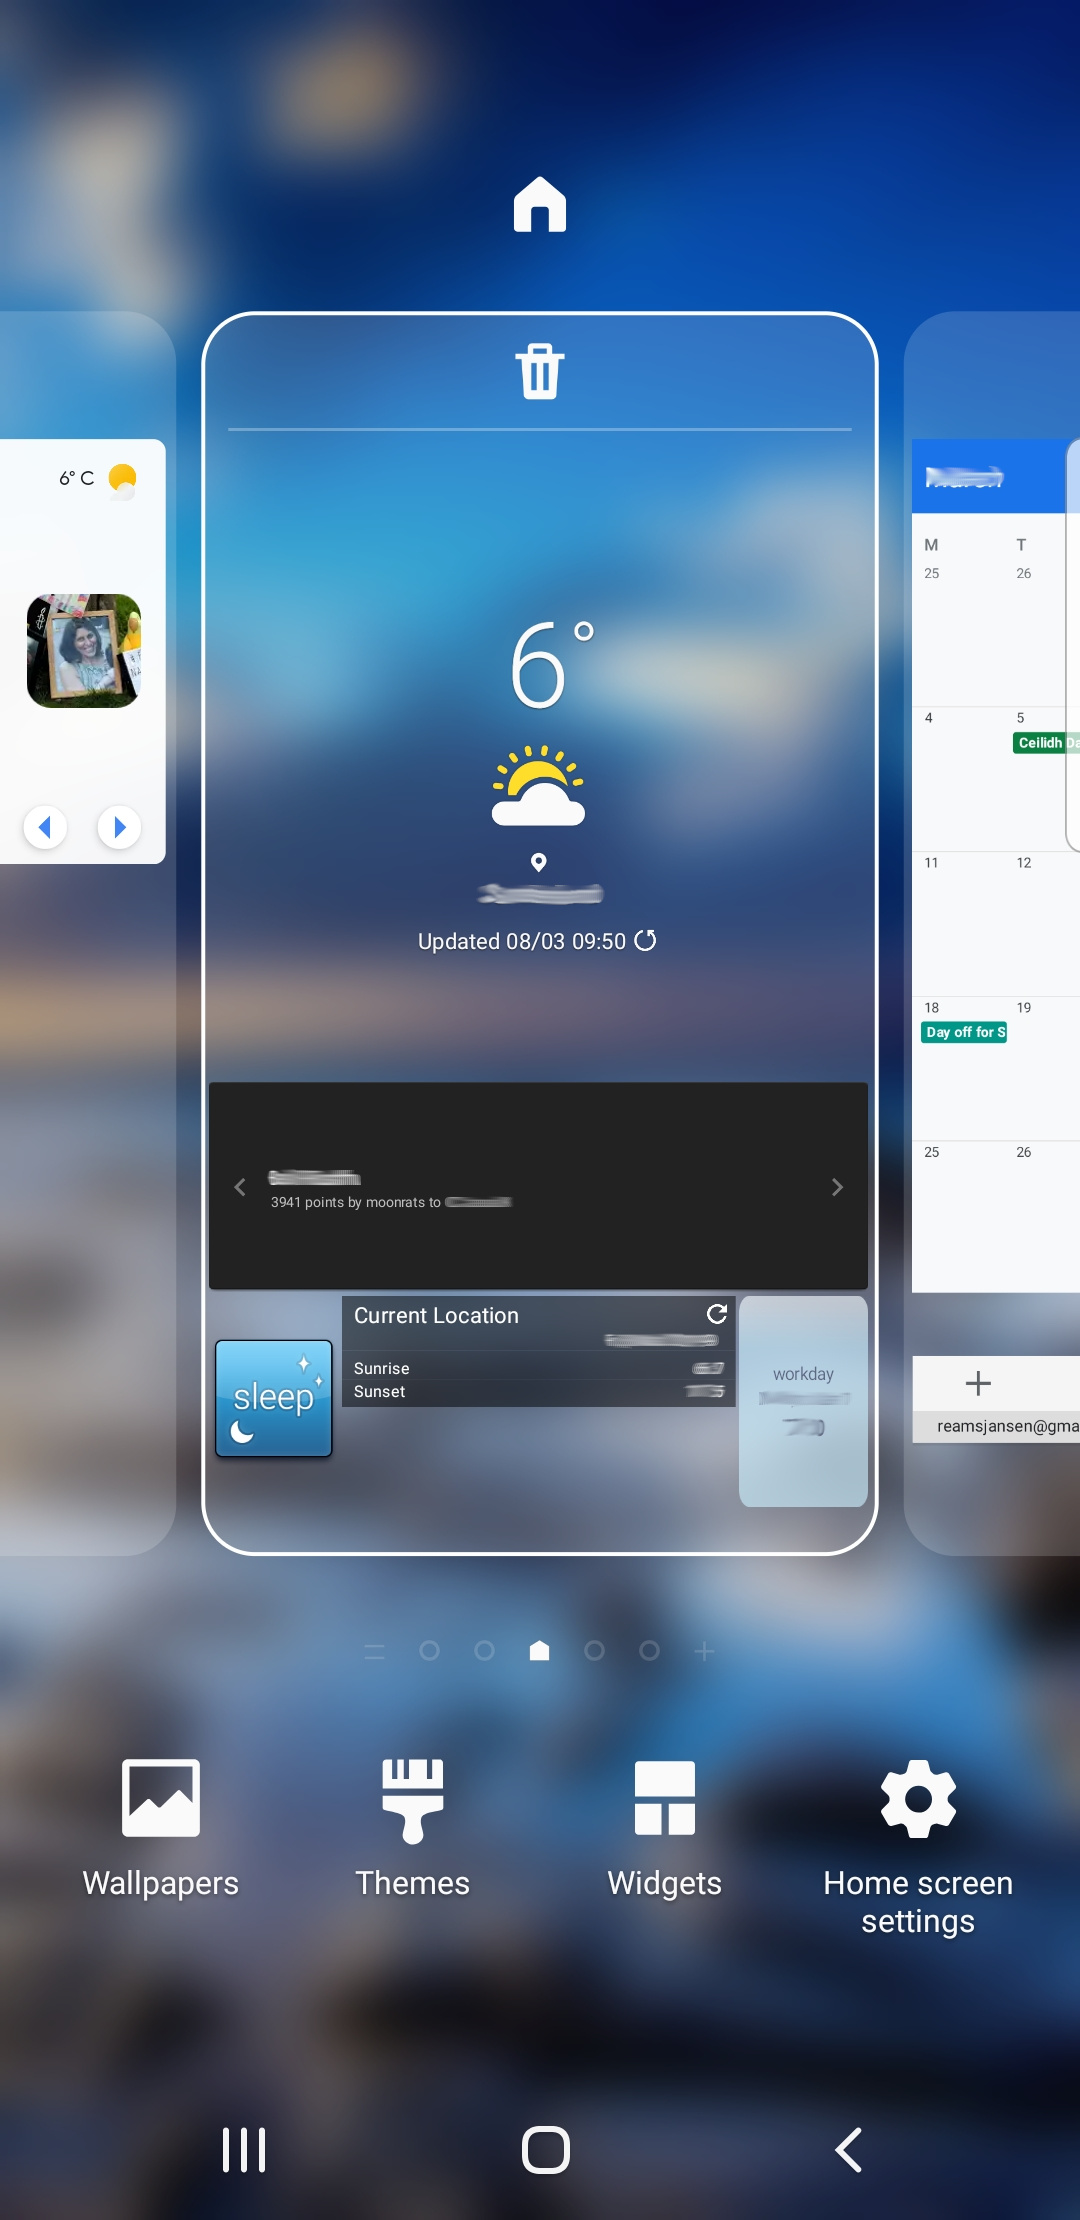
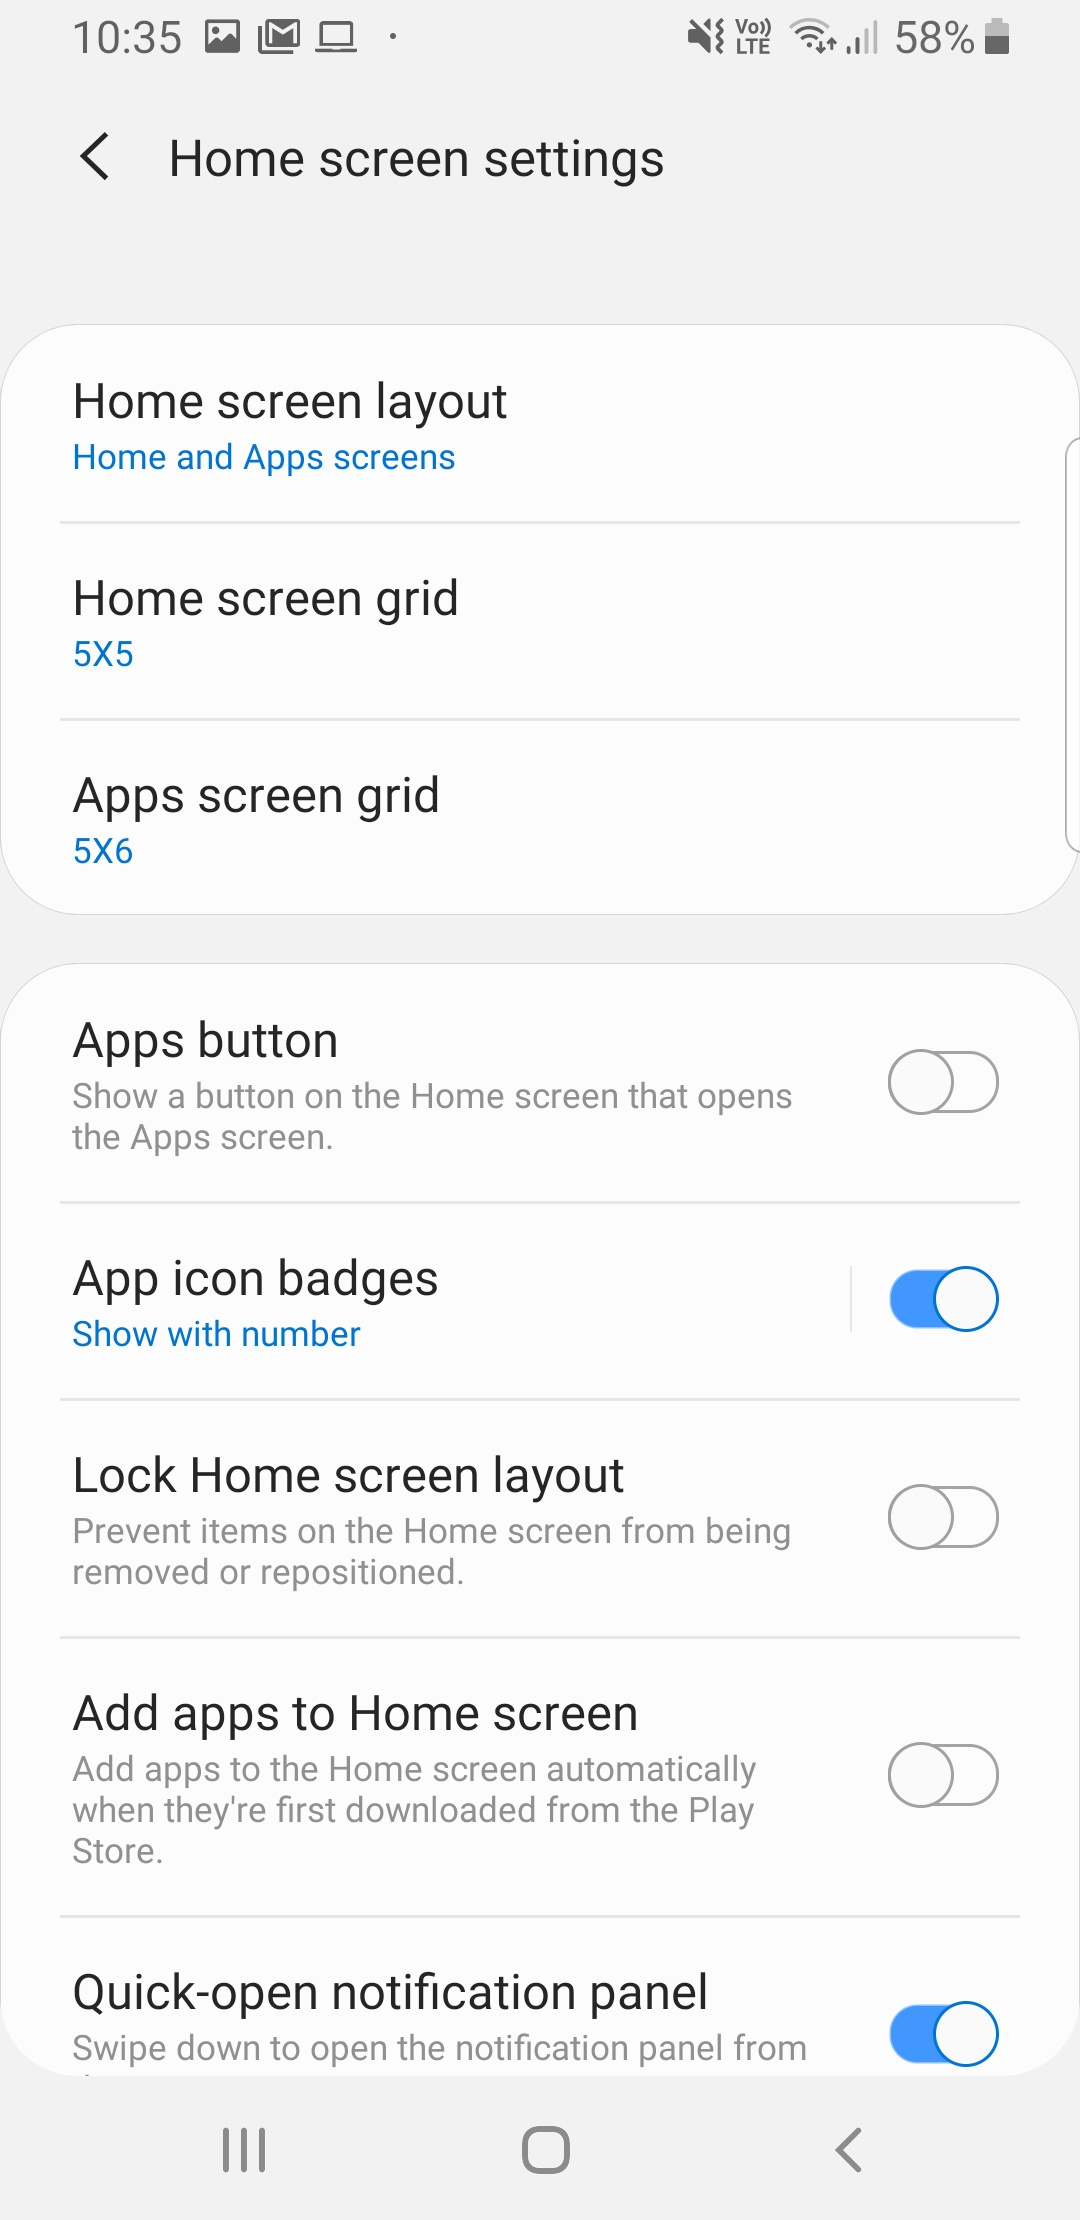
Want to customize your home screen? If you don’t want to go as far as changing your theme, there are still plenty of customization options available. Here are a few of our favorite features.
To change the background, follow these simple steps.
- Long press on an empty area on the home screen.
- Tap Wallpapers and select your new image. You can also add and change widgets by simply tapping the Widgets icon instead of Wallpapers.
If you want to make more extensive home screen changes, long press on the home screen and select the Home screen settings icon. From here you can adjust icon size, change your grid layout, disable app icon badges, and more.
How to customize the always-on display and lock screen


Now that you’ve customized your home screen, why not tweak the always-on display to your liking? While most people are fine with the default always-on display settings, it takes seconds to switch it.
If you want to customize the always-on display, do the following.
- Tap Settings > Lock screen > Always On display. From here you can update what you would like to appear on the always-on screen.
- To change the clock and widgets, just tap Settings > Lock screen > Clock style > Always On Display.
How to use Live Focus


While plenty of phones offer a portrait mode, the
- Simply open the Camera app and swipe right on the viewfinder screen.
- Position your subject three to five feet away from the camera lens to get the perfect shot.
- Once the subject is in the perfect spot, use the background blur slider to adjust the degree of bokeh in the background; Samsung allows you to see the adjustments in real time so you can make sure it doesn’t look overly processed.
Next, you can choose to turn off the beauty filter before taking the photo (it’s on by default) by tapping the sparkle icon and moving the slider to zero. Finally, make sure the two Live Focus circles are yellow before pressing the shutter button.
Once you have taken the photo you will see two images in the Gallery. One is your Live Focus shot, while the other is a regular wide-angle shot. Luckily, you can still adjust the background blur to the Live Focus image from the slider that will appear in the gallery.
While you will see both images in your Gallery, you may still want to manually save the images by tapping the overflow icon and selecting Save image. The benefit of manually saving the images is that both will be uploaded to your Google Photos account.
How to disable or remap the Bixby button


Although
- Press your Bixby button to open your Bixby Voice screen.
- Tap the overflow icon on the top right side of the screen and select Settings.
- Scroll down and select Bixby key and tap the Press twice to open Bixby button to make it much harder to accidentally trigger Bixby.
While you can’t officially disable
How to customize Quick Settings Tiles
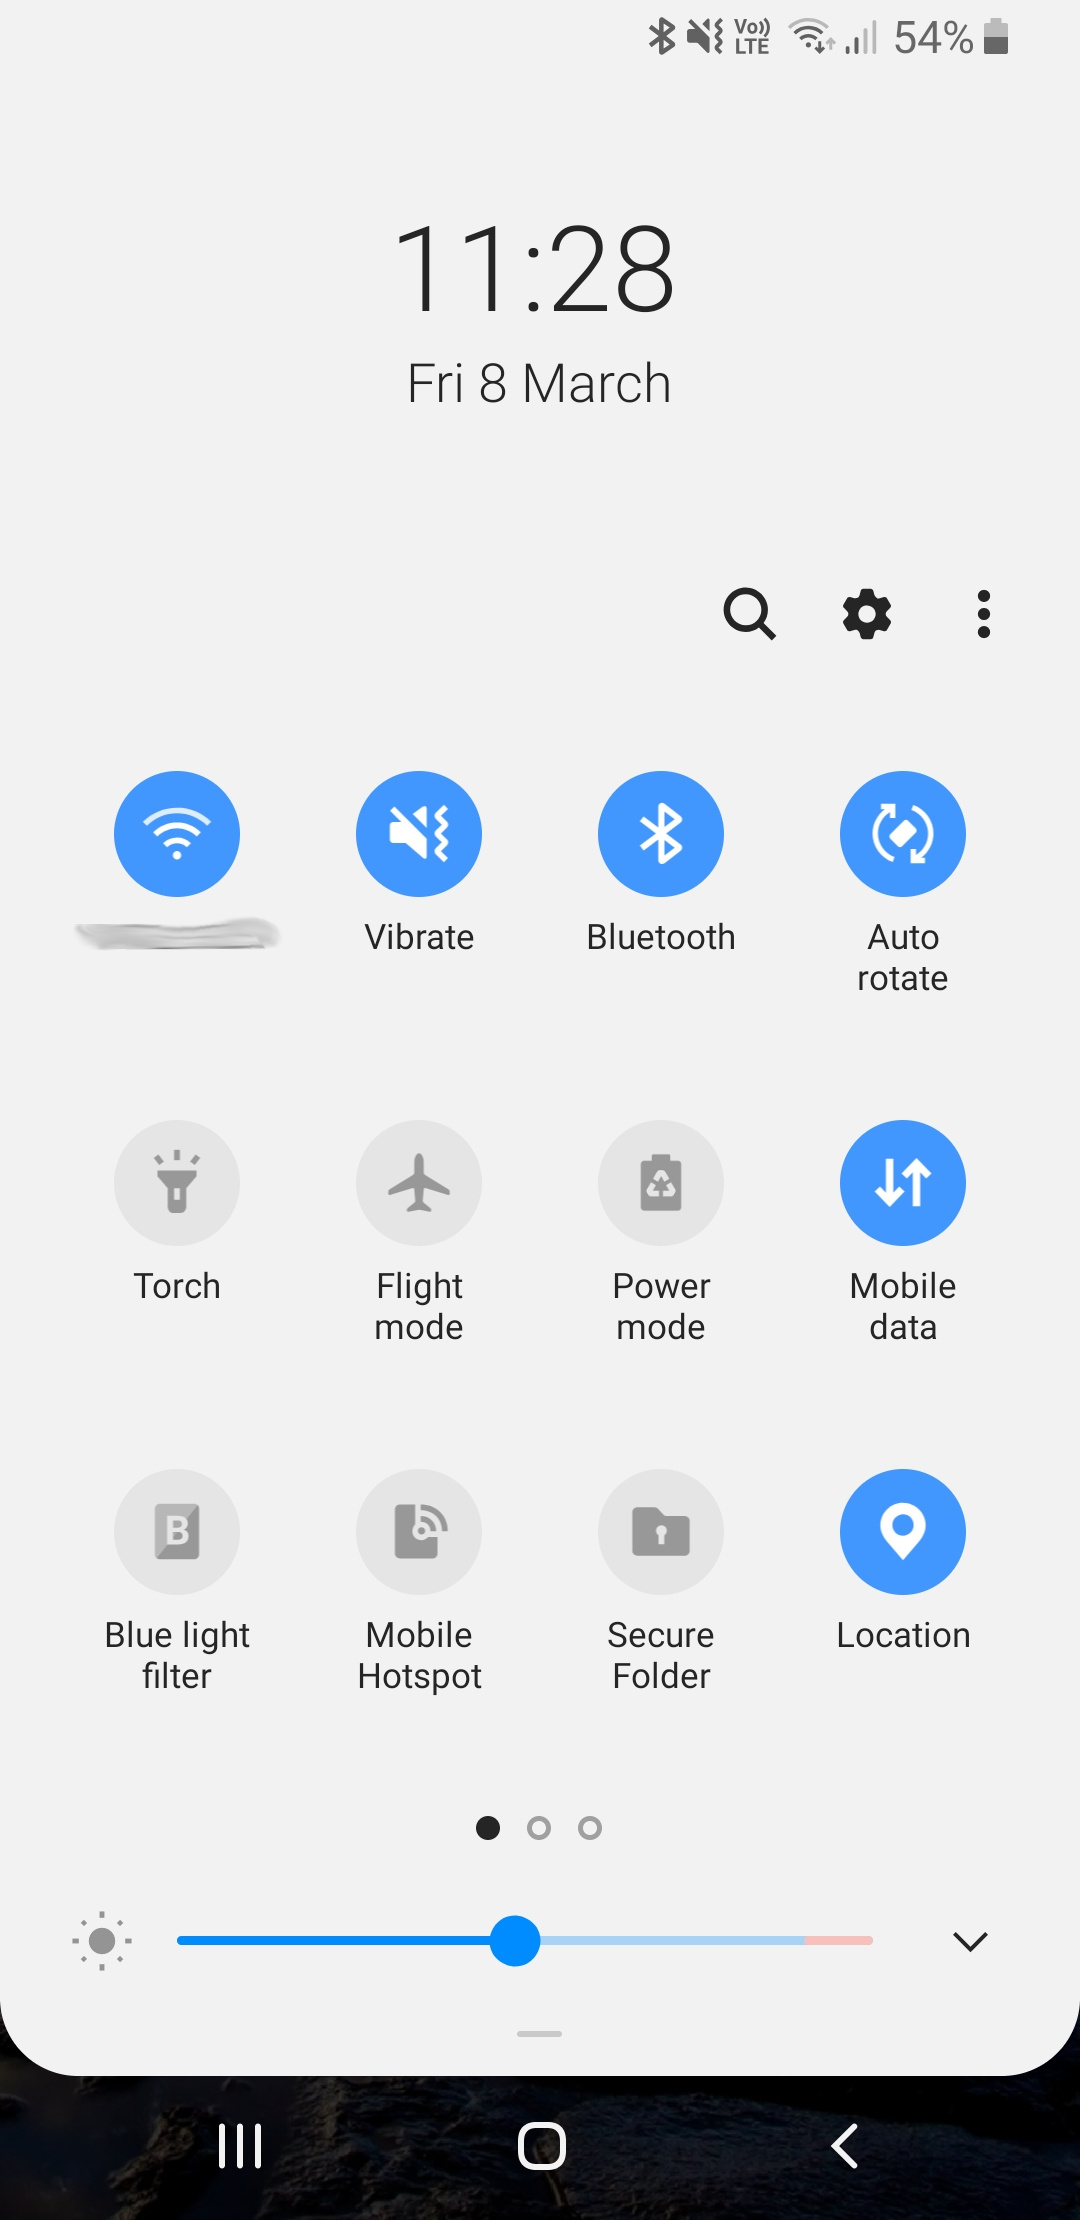
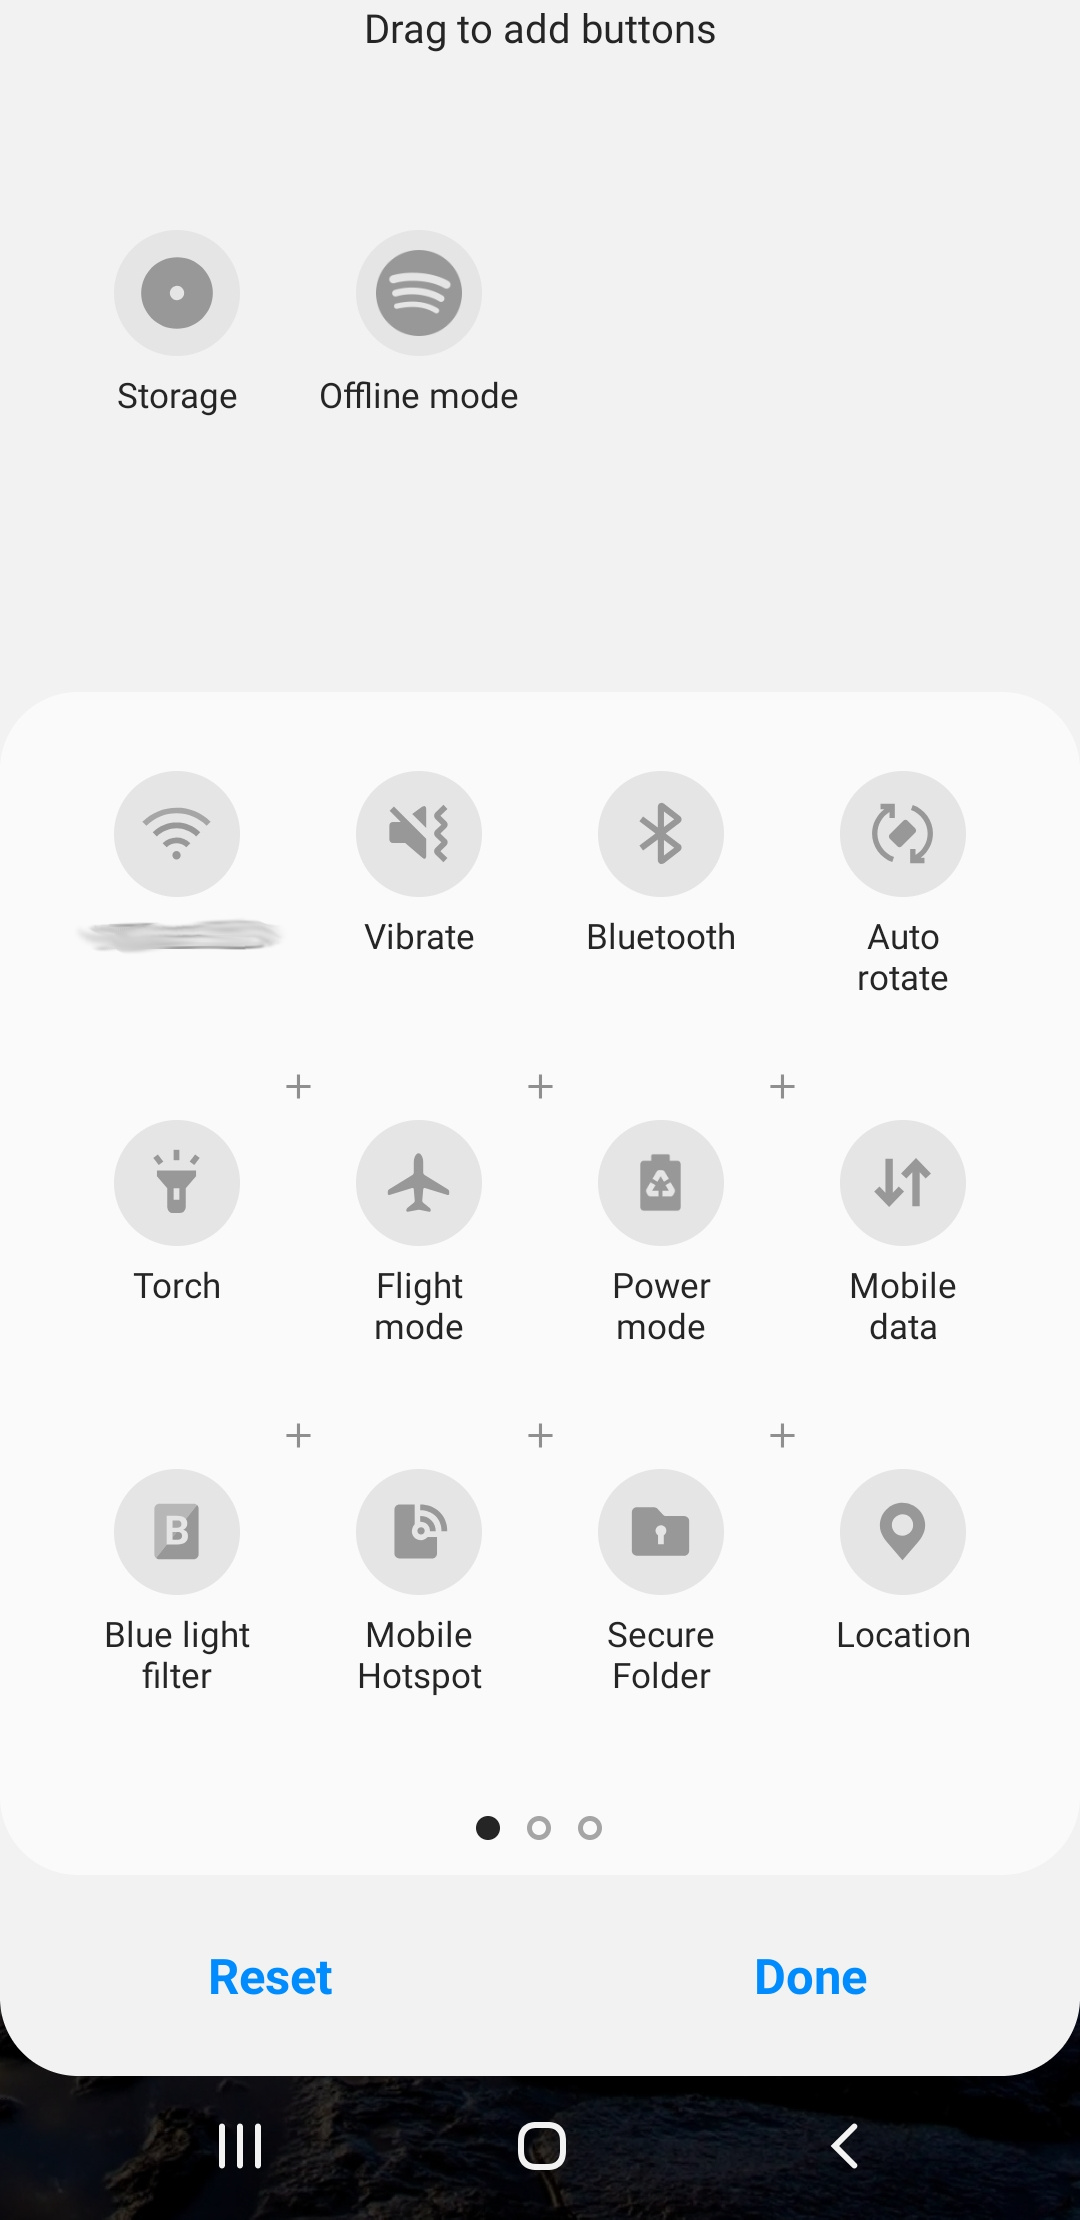
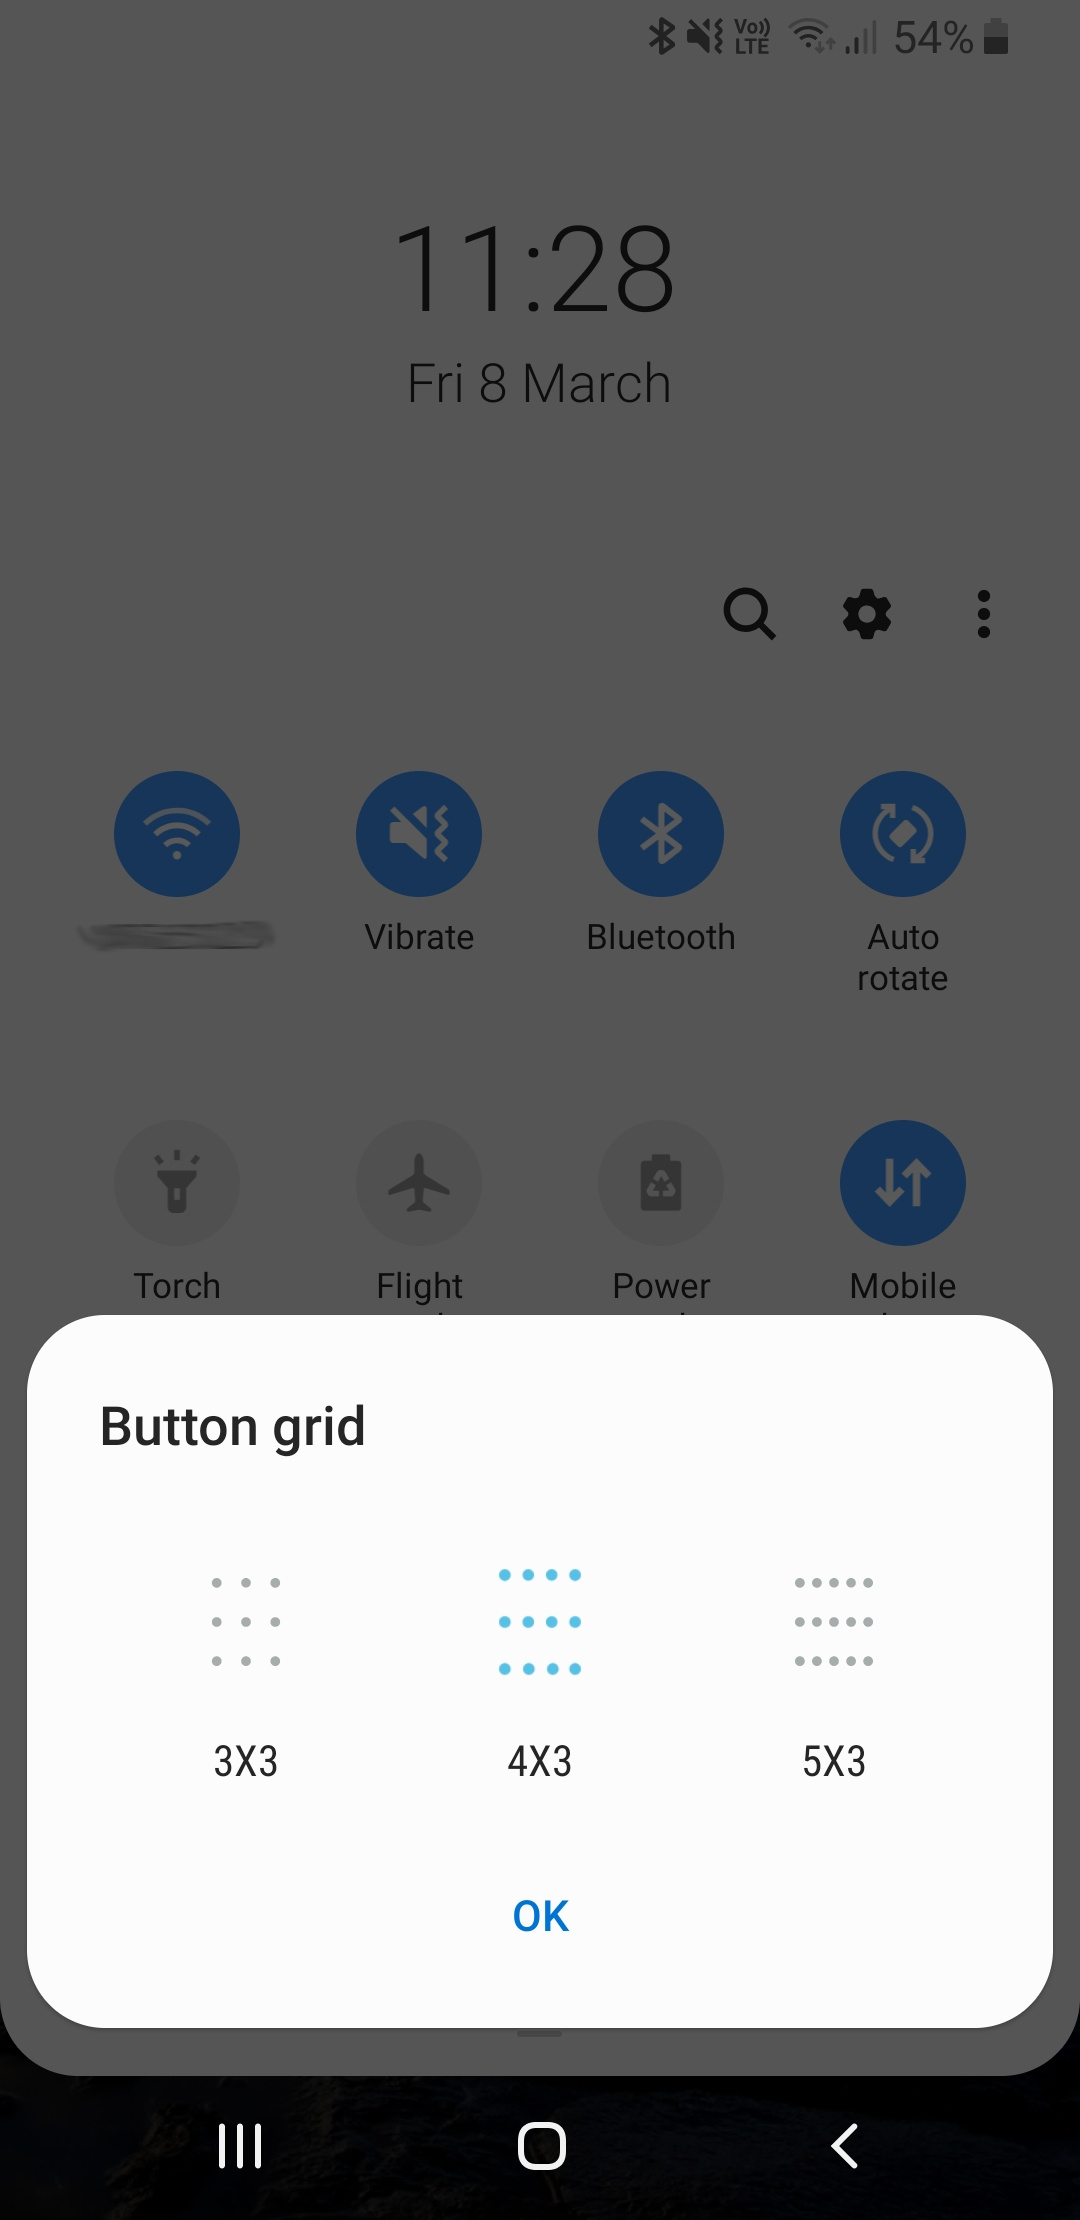
Quick Settings Tiles allow you to quickly access frequently used features on your phone. Just swipe down and you can easily connect to Wi-Fi, turn on the flashlight, or even quickly pair a Bluetooth device. If the number of Quick Settings Tiles seems overwhelming, it may be a good idea to make some adjustments.
- Use two fingers to swipe down from the top of the display.
- Press the overflow icon in the top right-hand corner. You will see options for Button order and Button grid. While Button grid will allow you to change the number of icons on the screen, Button order allows you to rearrange icons and remove ones you don’t need.
How to change the Navigation bar


Let’s be honest: Samsung’s Navigation bar is wacky. The reason Samsung continues to default to the back icon being on the right side is beyond us. Luckily if you’re one of the people who find Samsung’s custom Navigation bar annoying, it is incredibly easy to fix.
- Simply go to Settings > Display > Navigation bar > Button layout. Select your preferred option and you’re set.
Conversely, if you fancy giving Samsung’s gesture navigation a go, head back to Navigation bar and select Full-screen gestures. That allows you to swipe up from the bottom to go home, go back, or access your multi-app selection.
How to hide apps


Depending on the carrier, your
There are two ways to hide apps.
- From the home screen, simply long press on the app and select Remove from Home.
- If you want to hide an app from the App drawer, swipe up on the home screen and tap the overflow icon in the top right corner. Select Home screen settings > Hide apps. Select the apps you would like to hide.
If you need to access a hidden app, simply search for it by name.
How to set up Do Not Disturb


Low-priority and irrelevant notifications can occur at any time, day or night. If your phone’s text or email notifications wake you up, you might want to enable the Do Not Disturb feature. With Do Not Disturb, temporarily blocking unnecessary notifications is easy enough. You can even schedule a “notification-free time” when you don’t want to be interrupted.
-
- Head to Settings > Notifications > Do not disturb. From there, flip the toggle on or off.
- Users can set custom routine Do Not Disturb rules to help cut down on distracting notifications. Select Turn on as scheduled and specify when you want Do Not Disturb to flip on or off automatically.
Obviously, it’s essential that people can reach you in case of an emergency, even if your phone is in Do Not Disturb. To set exceptions, like allowing certain contacts to reach you through Do Not Disturb, modify your rules. Head to Settings > Notifications > Do not disturb > Allow exceptions. From there, you can choose the Custom button and begin listing the contact information or modifications you prefer.
How to turn on Dual Messenger


If you’re operating multiple social media accounts on several platforms, you may want to try out Dual Messenger. This tool is included in your Galaxy S9 from the beginning. Using the Dual Messenger app, you can create and share multiple instances of the same app.
To turn on Dual Messenger, you can follow Settings > Advanced features> Dual Messenger and hit the toggle button.
Editors' Recommendations
- The 20 best Samsung Galaxy Watch faces you should be using
- Samsung’s newest Android tablet is a perfect iPad alternative
- Have a Samsung Galaxy S23? Don’t update your phone to One UI 6.1
- The 6 best tablets for watching movies in 2024
- Best Samsung Galaxy S24 deals: Save up to $800 on the phone