Pimax Crystal hands-on part two : A very versatile headset
Today I host another great article by Rob Cole, who writes again about his experience with the Pimax Crystal headset. If you want to read his previous post, you can find it here.
Introduction
Following my first article earlier this year, Pimax’s Crystal has pleasantly surprised me with a series of software updates that activated new hardware features, whilst bringing quality-of-life improvements to headset connection and tracking.
As Pimax celebrates its 8th Anniversary, the Crystal is almost feature-complete and has become what could be described as a very versatile headset. Happy anniversary, Pimax!
The integrated Tobii eye-tracking operating at 120hz made a noticeable difference to headset setup and optical comfort, as well as lowering the rendering workload in games compatible with dynamic foveated rendering.
The inside-out tracking mode also saw big improvements, whilst a new 72 Hz mode allowed for sustainable frame rates in resource-intensive flight and driving simulators, especially for users without top-tier graphics cards.
Later during testing, I received the SteamVR “lighthouse” faceplate, letting me enjoy the precision of sub-mm room-scale tracking, whilst enabling the use of Valve Index, HTC Vive, and Pimax Sword controllers, as well as Vive and Tundra trackers.
Following the first article, I sold my RTX 3080ti graphics card and bought an RTX 4080, boasting around 30% increase in rasterization power; providing higher frame rates at higher resolutions, which really let me start to appreciate the headset’s full potential.

However, as RTX4090 users reportedly still struggle to push the headset to its full potential, Pimax Crystal will certainly benefit from the next generation of GPU, probably not due until 2025. You can never have enough GPU power for VR and upgrading from 2080ti to 3080ti to 4080 enabled higher frame rates and increased super-resolution on my Valve Index, with a very noticeable difference in the headset. The Pimax Crystal is no different in that respect.
For now, good results are being achieved on the Pimax Crystal by using smart technology like dynamic foveated rendering, a specially developed OpenXR run time, and third-party tools like Quad View rendering. Towards the end of my testing, I got to try out Almalence’s new “Digital Lens OpenXR plug-in” with interesting results, more on this later.
Here are my findings since the first article was published, starting with a subject close to my heart.
Headset ergonomics
Initially, I found the Crystal to be a relatively comfortable, though obviously heavy, headset. It weighs 1.2kg with the tether laid flat. Much has been said about the headset’s weight in reviews, but something to consider is that human beings can carry up to 20% of their body weight on their heads, as long as it’s balanced and comfortable.
According to AGV Sport, many motorbike helmets weigh between 1400-1800 grams, and these are designed for active use in extreme conditions. So, yes, it’s heavy, but after a couple of sessions, you don’t notice it anymore as your body (neck and shoulder muscles) starts to get used to it, because the rear battery helps to balance out the front of the headset.
We do need to be aware of inertia though, with a heavy headset tending to move around more on the face than a light headset. However, this can be mitigated to some degree by having a great fit that keeps the headset securely clamped to the face without exerting unwanted pressure by overtightening the straps.
Talking of ergonomics, initially, I couldn’t get far enough forward into the headset using the comfort face cushion (that has an extended head pad), which slightly reduced my field of view whilst also causing a ring of distortion around the lens edges and pronounced chromatic aberration.

The regular Pimax face cushion brought my face forward into the correct position but didn’t support the sides of my face, letting the headset wobble about on my face when I moved. This often caused the lenses to go out of alignment with my eyeballs: sometimes the lenses would end up in the right place but more often didn’t, causing the visuals to degrade with movement, which required constant adjustment.
This problem seemed to be exacerbated by a loose fit between my face and the face cushion, rather than just the extra weight of the headset. Tightening down the harness increased face pressure without preventing side-to-side movement, as the plastic base for the face cushion just seemed to be made for someone with a huge head!
This is an easier problem to solve than fitting a headset that is too narrow, as all that was required with the Crystal was a way to reduce the width of the face cushion. For reference, my head is 59cm meaning I take a medium-sized bicycle helmet, albeit at the upper end for medium.
The stock “face gasket” on my Valve Index was simply too narrow to allow my face to fit and required an expensive 3D-printed wide plastic base and whatever face cushion I could re-cut to fit, which was less than ideal. Thankfully, the Crystal didn’t require this drastic a modification.

Sticking Velcro self-adhesive strips back to back, I made simple side spacers to reduce the width of the plastic face cushion base, before refitting the regular face cushion on top. After some adjustment this gave a snug fit with no side gaps, taking away the wobbling when moving about, which was a big improvement. I also enjoyed the feel of the regular cushion and found it cooler as the extended face cushion had made my forehead a little too warm.
Moving onto the rear, the standard cushion was quite thin and did not feel supportive or comfortable, often causing a slight pain across the middle of my parietal bone after 1-2 hours in VR. After some puzzling about how to solve this, I used a spare Valve Index headset rear foam spacer (made for small heads) and cut off the portion that plugs into the Index harness, before sticking strips of industrial-grade Velcro onto the rear.

With the new rear cushion in place, combined with the modification to the face cushion, I found the Crystal became super comfortable and it stopped moving independently of my head when turning or looking about. So despite the 1.2kg weight, I ended up with a well-fitted headset that basically felt like an oversized Valve Index, which is no bad thing! Visually, things were much improved, from a slight increase in field of view to minimal distortion across the lens edges, and much reduced chromatic aberration.
I had planned to modify the top strap but found I didn’t need to, as my mods had stabilized the headset. However, your mileage may vary with Pimax itself releasing a head strap upgrade in the near future for around $20. I’m still interested in trying out the new head strap as I’m sure it will bring further stability and comfort benefits to my already very usable setup.
(Image by Pimax)

As the cushions are just secured to the Crystal using Velcro, it’s super easy to make modifications without causing any damage to the original headset parts. I would highly recommend people try modding their Crystal if having any comfort or stability issues. The community has gone further bringing out designs for 3D printed side spacers, strap attachments, and face cushion bases.
Before this article went live, Pimax released 3D CAD files for the Crystal, letting the modders really go to work with their creative use of 3D printing. So expect to see all kinds of cool stuff coming out soon. https://pimax.com/pimax-crystal-3d-printable-model-for-modding/
Pimax Play updates

Over the course of several months, my Crystal received a number of software updates, after undergoing testing by the Pimax Crystal Beta testers (a group of early adopters). The most immediate improvement was connection reliability, which saved me from suffering the tedious burden of making multiple attempts to connect the headset to my PC.
The connection improved so much that I started using the 6-meter fiber optic tether cable, enjoying increased freedom of movement as it was thinner, lighter, and longer than the copper tether. I still avoided using the DP repeater (the box on the left side of the headset) or the USB power hub, by plugging the tether straight into the headset’s DP port.

Together with connection reliability, the Client updates included much improved inside-out tracking, local dimming, lighthouse mode, audio latency adjustment, bug fixes, and other important features.
Battery life seemed to be around 3-4 hours (eye tracking uses more power), with the spare battery swapped in seconds to provide power for longer sessions. I wasn’t bothered by the lack of charging whilst using the headset, as the two batteries provided more than enough power for a long day of VR.
Arguably the most important update, and something long awaited by the non-Beta community, was the activation of eye tracking.
Eye Tracking
Apart from sessions a few years ago using the HTC Vive Pro Eye and Microsoft Hololens, I didn’t have any experience with eye tracking. It was potentially the big game changer for Crystal, with reported improvements to rendering performance and optical comfort, together with the supply of eye data for applications like VR Chat. It is also very useful in commercial and enterprise work, where it provides biometric data allowing for actionable insights into user behavior.
Following the software update, I noticed something called “Eye Chip” being installed, with new settings appearing in the Pimax Client to allow activation of the eye tracking system. The eye-tracking system is provided by Tobii, who is the market leader in eye-tracking technology. This is what the company says about its technology:
“How eye tracking works in XR? In an XR headset, eye-tracking components typically include cameras and light sources placed in a ring-like structure between the user and the display. The core machine-learning algorithms interpret the camera feed to generate a real-time stream of data points such as pupil size, gaze vector, and eye openness. This information can be used, for example, to determine how well a person can follow a stimulus, how they react to a scene, and their intent.”
The benefits of eye tracking, according to Tobii, include a sense of realism, graphical clarity, fidelity across FoV, high and stable frame rate, comfort for extended use, and smooth rendering.

In terms of how it physically works, the glass aspherical lenses fit with an LED emitter ring around the perimeter, bathing the eye with invisible light. You can see the ring of LEDs around the lens in the image above. An angled mirror layer in each eye tube (underneath the removable lens) reflects the light into a small tracking camera for each eye, with the data being processed using a special algorithm.

As the image above shows, once installed, there are additional settings in the headset menu. Pimax have published a detailed blog post to instruct users how to use eye tracking on the Crystal, as seen in the following link: https://pimax.com/de/how-to-use-eye-tracking-on-the-pimax-crystal/
Calibration
Inside the Pimax client software, there is a calibration routine, which is activated by using the headset settings. There is a small tab (visible in the image above) that starts a simple Unity-based application, with a series of white and green dots that must be followed by the user.
Once calibrated (start by pressing A on the controller or Enter on the keyboard), you quit the application (press B or Exit) and return to the Client headset settings menus to find eye tracking turned on. Calibration should be performed before starting SteamVR or OpenXR runtimes: if you try and turn it on during the middle of a session, it won’t be recognized.

It’s difficult to try and photograph as it detects the presence of your face in the headset (which can be spoofed by placing a finger or tape over the proximity sensor) and it is also looking for your pupils and won’t work without the eyes being tracked. Anyway, I managed to grab the image above, showing the start of the eye tracking test.
Visual fitting indicator
As soon as the proximity sensor detects your face, a visual indicator guide appears with a simple graphic and “up” / “down” indications. This feature uses eye tracking to determine the optimal vertical position of the headset on your face. The adjustment is made by slightly raising or lowering the headset against your face: it’s quite subtle and sometimes a little tricky to get right, but generally works well.

As soon as the eyeball alignment is good, the guide disappears leaving you ready for the next step, which starts the automatic IPD feature.
Automatic IPD
IPD is the distance between your pupils, usually expressed in millimeters. Setting IPD correctly is very important for VR users, to avoid eye strain, headaches, and nausea and to ensure that world scale and stereo acuity are correct. The average IPD is 64mm for males and 62mm for females, though it changes up to the age of about 30.
Far interpupillary distance, where the user is looking far ahead, is the measurement used in VR headsets, as near pupillary distance (looking at a close object) results in an IPD setting 3-4mm narrower as the eyes rotate inwards. For VR headsets we are interested in the binocular pupillary distance (distance from the center of one pupil to the other), though IPD can also be expressed as monocular pupillary distance (separate numbers for left and right eyes, often slightly different).
Pimax is unusual in offering individual IPD offsets, vertical and horizontal, as seen in the settings menu found below. This makes a small adjustment to the software render relative to the lens center, to bring subtle improvements to optical alignment.

To give a real-world example, my optician confirmed my far IPD at 63.5mm binocular, and monocular measurements of 31.5mm right, 32mm left. It is also very common for left and right eyes to sit at slightly different heights, which most headsets (apart from Pimax) cannot accommodate without resorting to tricks like slightly twisting the headset relative to the face. Bear in mind though, there is a limit to software adjustment as lenses have an optimum physical center (sweet spot), and moving further away from this causes image degradation.
Once the visual fitting indicator is aligned on the Crystal, the IPD adjustment scale pops up, giving you something to focus on, which triggers the motors as required to set what it thinks is your ideal IPD for the headset.
Something I soon noticed was different IPD settings depending on when calibration was last run, as eye tracking is set by your craniofacial position within the headset. Ideally, you want to run calibration every time you put the headset on: this is not unique to the Crystal but a known issue with any eye-tracked headset. Each time the calibration is run, it adjusts the algorithm using your personal data, and this sets the calibration to the “known conditions” at that time.

With the headset calibrated and fitted correctly, it landed around 63-64mm which was close to my prescription, while with less care it tended to land around 60-61mm which then required manual adjustment using the buttons on the headset, or software inside the Pimax client.
One interesting question is: was 63.5mm actually the right setting for my Crystal? After playing with IPD following my ergonomics adjustments to the headset, I actually found going a little wider helped both eyes get a clear picture, on 63.5mm my left eye tended to be slightly out of focus. Widening to 65mm showed an immediate improvement, without leaving me feeling cross-eyed after a session, or causing any weird world scale problems.
The Crystal does not use parallel displays but has “canted” displays like the Valve Index, and I’m assuming this is the cause of the difference between my measured IPD and what actually works for me in the Crystal. The magnesium alloy skeleton and displays of the Crystal are canted, about 10 degrees on either side, which is double the amount of canting on the Index: users will want to experiment with IPD settings to find what works best for them!
Dynamic Foveated Rendering
With the eye tracking now running, and my headset set up, it was time to explore DFR (dynamic foveated rendering). This is a simple idea in concept (the human eye has a narrow, high-resolution focus , so the image needs to be sent in high resolution only in that focal region) but complex in practice due to the peculiarities of the human vision system.
So what is foveated rendering? It’s well explained by Doug Eggert of Tobii:
“Foveated rendering is a device-performance optimization technique that concentrates rendering resources on the area of the display where the user looks. The content in the area immediately surrounding the user’s gaze point is rendered in high-resolution. The rest of the image — the part in the user’s peripheral vision — is rendered at lower resolutions, reducing the resources needed to render a scene without any perceived degradation in user experience.”
(Image by Tobii)

There are two types of foveated rendering, the first of which is known as fixed or static foveated rendering. This can be deployed to any device (you’ll see it used on Meta Quest) and has a fixed center at higher resolution whilst the periphery is considerably lower resolution. Whilst this saves resources, it does not provide an optimum visual experience, with noticeable degradation towards the outside, which can create a sensation of tunnel vision.
Something interesting that Tobii mentions on its website, is that earlier headsets with fresnel lenses did not have great edge-to-edge clarity, so fixed foveated rendering worked well as the edges of the lenses already had blur. However, with the move to pancake and aspherical glass lenses with good edge-to-edge clarity, this no longer works so well as there is a need to render the entire scene in high resolution.
Dynamic foveated rendering (DFR) uses accurate eye tracking to render the portion indicated by the user gaze in high resolution, with areas outside of this gaze at medium resolution and the periphery at low resolution. This requires a well-calibrated eye tracking system running at a high frame rate (120hz) and using compatible XR software. The image above from Tobii shows the two types of foveated rendering in a typical scene.
You can find more information about this topic here: https://pimax.com/pimax-crystal-what-is-dfr-and-how-it-enhances-the-performance-of-dcs-vr/

Within the Pimax Play client, there are settings for eye tracking including DFR, which can be switched with 3 tiers of adjustment, or left off. Due to a bug, it appears the minimum and maximum settings were initially the wrong way around, as some users found when experimenting.
Something to be aware of, despite eye tracking being built into the Pimax Play software at the client level, is that not all games will work with DFR, so Pimax has published a list where users have tried 42 different games with varying results.
https://docs.google.com/spreadsheets/d/16GNwXAVCjUF9vCW6ubiUPQT00hZ7hRT5K_sbO6P9nYc/edit?pli=1#gid=0
To check whether DFR is working, use a tool like FPSvr which will show your frame rate: you will see a noticeable difference when switched on or off. Also, be aware that DFR (and eye tracking) requires a PC client, so it’s not something you can use in standalone mode.
Taking one of my favourites, “Aircar”, I tried running DFR at maximum and got the following result in 90hz mode:
- 100% resolution (4312×5104 per eye)
- Graphics settings to the maximum in Aircar
- Aircar render resolution 1.0
- Average FPS 89.4
- GPU frame time 7.7ms
- CPU frame time 2.7ms

This was very impressive as previously I had to use 70% resolution to hit a stable 90fps, which resulted in a slightly softer, less clear image. With DFR running and resolution to the maximum, the image quality was breathtaking, and I didn’t notice any artifacts or visual tearing even moving my gaze about as quickly as possible.
Eye Tracking Data
Something that Pimax Crystal users noticed is that the eye tracking does not expose the full range of eye tracking data. Pimax has been asked about this in a recent AMA:
Greenonetrailmix: “Tobii has eye tracking values that are not enabled for the Pimax Crystal that other VR headsets have with Tobii hardware, one special case is the Vive Pro Eye. The best eye-tracked headset on the market. Why haven’t we seen some extra values that the hardware has for Social VR applications such as VRChat? The community as a whole for social VR wants these extra features integrated. Missing features in question: Pupil diameter, eye openness, convergence distance, and gradual non-binary blinking.”
Pimax: “Thanks for your question. While integrated eye tracking introduces the capacity to support an array of eye-tracking-enabled features, it’s important to prioritize those that provide the best value to users for the target use cases. For example, the mentioned Pupil diameter feature is a scientific purpose signal available via Tobii Ocumen, an advanced toolkit that provides developers with a framework to record, organize, and analyse biometrics as well as rapidly build and deploy scientific-grade VR products in specialized industries like healthcare and medical assessment. Pimax Crystal, as a high-end gaming VR headset, is currently not compatible with Tobii Ocumen.”
One method to expose this data is to use a third-party application like “BrokenEye” developed by Ghostiam which will provide gaze direction, pupil diameter, blink or eye openness, and the camera stream from each eye. This can be downloaded from here: https://github.com/ghostiam/BrokenEye

(Image by Ghostiam)
For VR Chat users looking to use eye data for their avatar, they will need to download two applications by Ghostiam called “VRCFaceTracking” and “Tobii Eye Tracking Module for VRCFaceTracking”. Full instructions are included with each application, please follow the link for more information: https://github.com/ghostiam/VRCFT-Tobii-Advanced
Standalone mode
Finally, the new software update activated the long-awaited “standalone mode”. This is where the XR2 processor and onboard battery start to make sense. After removing the tether I switched the headset to standalone mode and powered it up. The SteamVR faceplate is left installed, but the headset automatically switches to Pimax’s inside-out tracking which the XR2 processor controls, instead of tracking data being sent back to the client PC.

A black background with white dots, that I’m assuming are a loading screen, appeared, followed by a room setup screen offering a quick setup, or a custom room setup where the controller is used to draw an outline of your playspace. Once the room setup is complete, a home menu loads that will be familiar to Android users. The Crystal runs on a modified version of Android, similar to the Meta Quest and Pico 4, and can use OpenXR software which should make porting Quest and Pico games relatively easy.

It felt very cool to be detached from the tether. Though I’m primarily a PCVR user, I’ve used enough headsets like Quest, HTC Vive Focus, and Lenovo Mirage Solo to be familiar with the benefits of going standalone.
I guess the headset is running at lower resolution than PCVR mode, as things look a little softer compared to using PCVR where you have a powerful GPU drawing hundreds of watts from mains power. In standalone mode the Crystal is running on the XR2 processor, which has a much more modest power demand, it’s actually very impressive considering the huge difference compared to a PC.
I looked through the software library which consisted of the following titles:
- Hitstream
- X-Fitness
- Pierhead Arcade 2
- David Slade Mysteries: Case Files
- Labyrinth Trap VR
- Voxel Fly
- Z Show
- Frog & Froggie
- First Person Tennis
- Whirligig VR Media Player
- OpenBrush
- Firefox (web browser)
As Open Brush was a free title to download, I installed it quickly. Within minutes, I was happily drawing squiggles. The headset and controller tracking in the standalone mode was competent, I had no issues during my session, and explored the home menu finding many controls including local dimming and brightness.

Other applications were paid, and not having set up any payment methods I didn’t download anything else, as I was more curious about the standalone mode than wanting to spend hours using it. Losing the tether took much-needed weight and drag off the headset, making my head feel lighter and less restricted.
The standalone mode certainly works but will require a substantial investment in content to attract users, as the store is very limited at the moment, and cannot compete with existing standalone stores from Meta, HTC, and Pico. As the old saying goes, “Content is king!”
SteamVR faceplate
The most exciting new feature for me was the SteamVR faceplate. After registering my interest, the nice people at Pimax soon shipped one, and following some software updates I was ready to install it.

The first step of the installation is removing the original faceplate, which is both cosmetic and functional, protecting a series of mesh air filters, fans, and air channels. To remove the original faceplate, I recommend using a plastic spudger or similar pick tool. You can leverage the edge and open a gap before working around and giving the faceplate a hard tug, it should pop off.

It’s then very easy to fit the lighthouse faceplate, with a central connector plugging into the headset, and the plate then clipping into position when pushed down with light finger pressure.
After the latest software update, I switched to Lighthouse tracking in the Pimax Play Client, which immediately recognized the SteamVR faceplate fitted to the Crystal. My three 2.0 base stations were also quickly recognized, so I paired some Valve Index controllers using the Pimax Client.

After starting SteamVR, I did the room setup, choosing standing mode just to check things out. The familiar sight of Index controllers sitting in my home space was very welcome, I moved about randomly twisting and turning to check out the tracking, it was flawless. It had also set my ground height to the actual floor level, whilst providing that rock-solid sub-mm precision that lighthouse users come to expect.

I opened some games, to check out the controller functioning and tracking, and I had no issues at all. After running the room setup again to increase my play space, I checked out “Into the Radius” which has a full body equipment rig mounted on the player’s body, leading to lots of small intricate movements. The SteamVR faceplate passed this acid test with flying colors. Somehow I then spent another 30 hours over the next week just playing Into the Radius… I think I found my new favorite VR game!
I did a back-to-back comparison with the Index and was shocked at the difference with the Crystal demonstrating its vivid colors, deep blacks, and super sharp clarity whilst the jump to 35ppd really opened up the landscape, letting me see clearly across the game world. Super impressive stuff.

Another important consideration for simulator motion platform users is that motion compensation works really well on the lighthouse SteamVR tracking system, allowing for precise tracking without strange drifting or other motion-platform-related tracking errors creeping in.
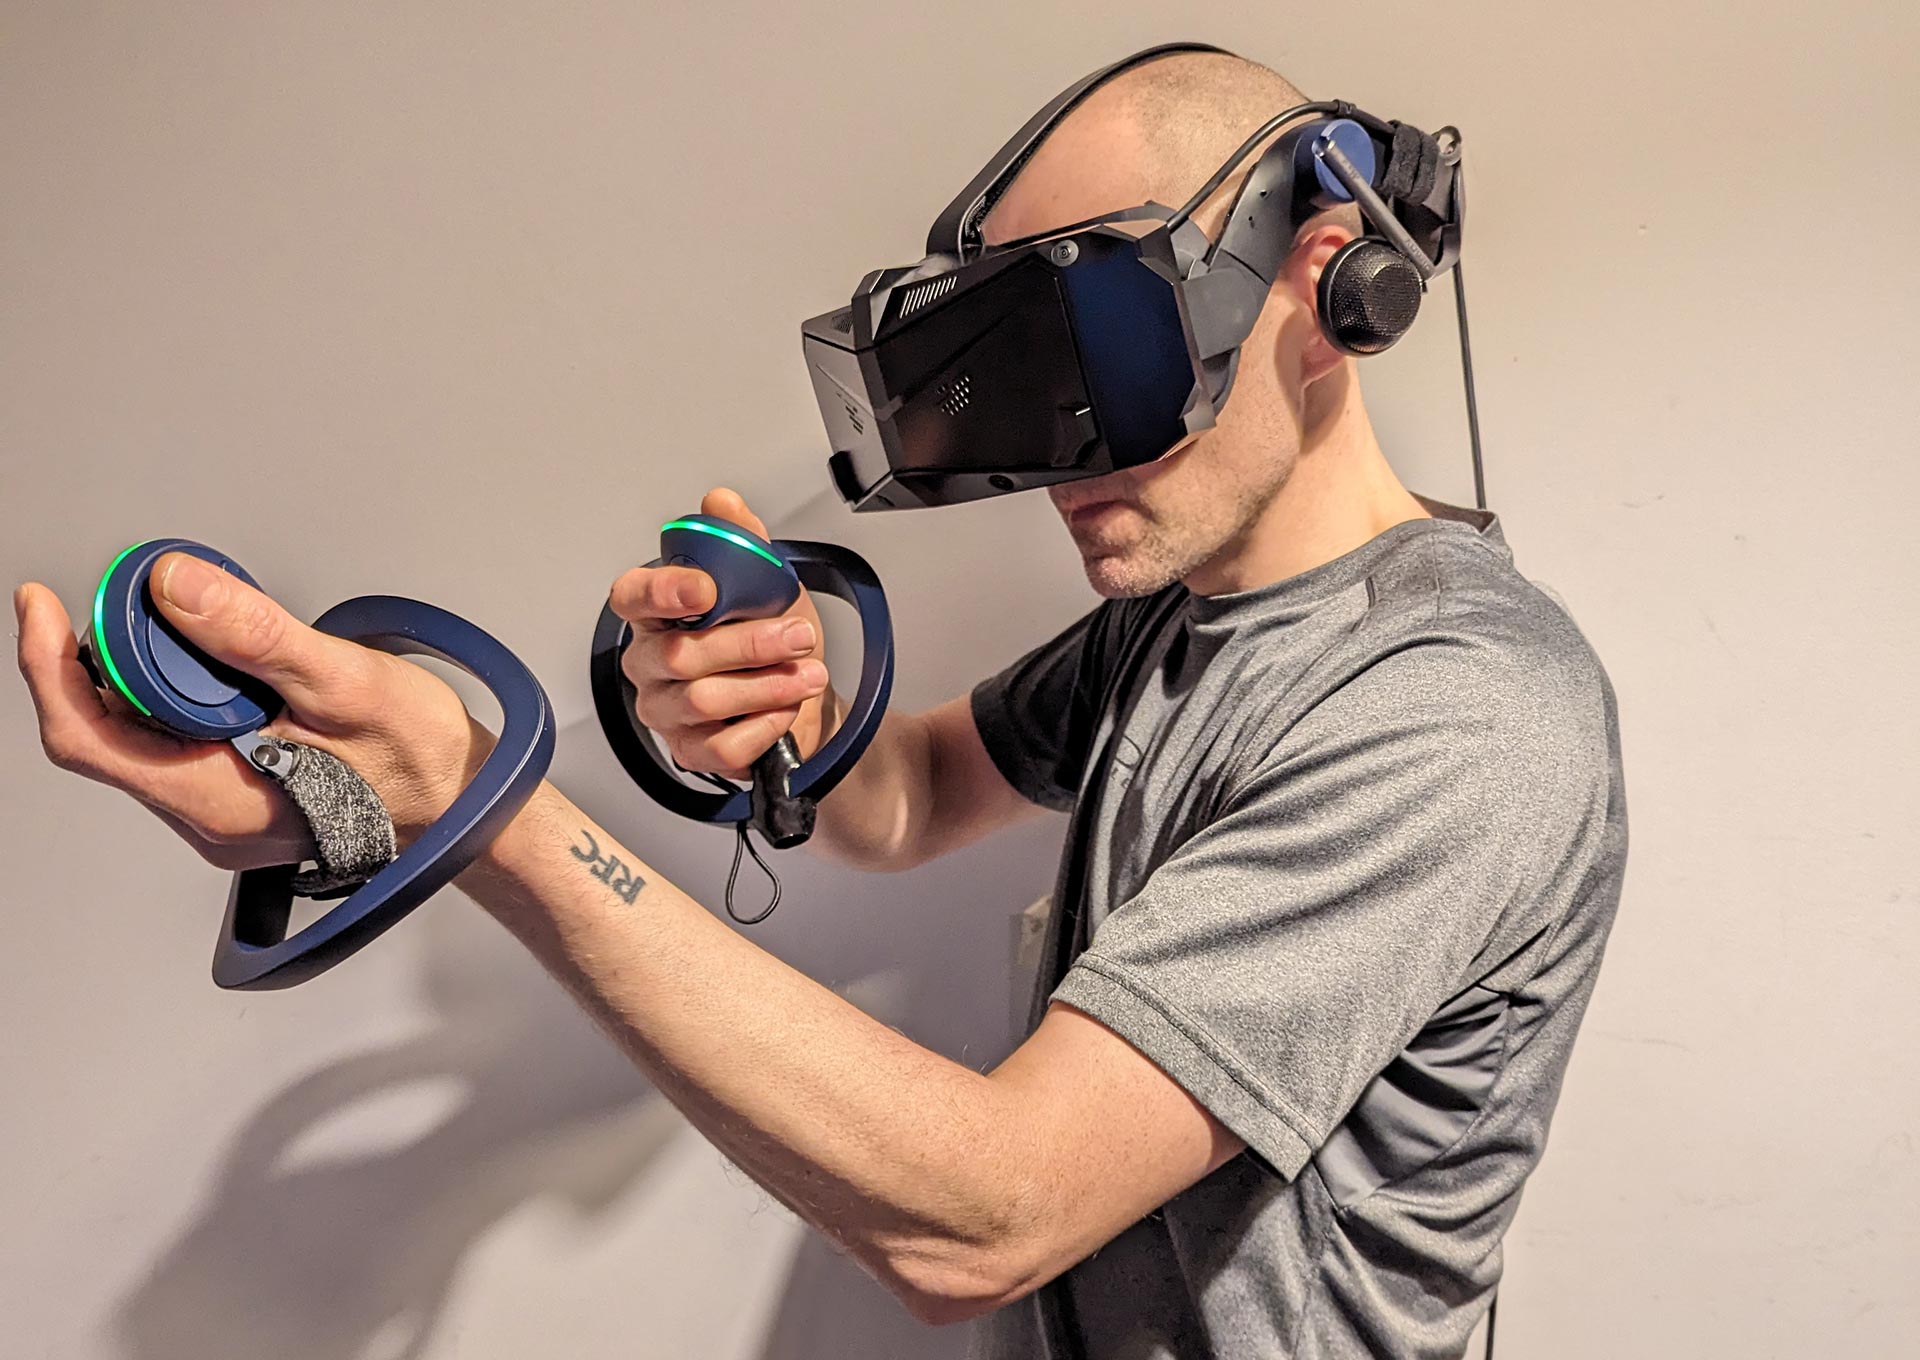
I also tried my Pimax Sword controllers, which immediately paired without any fuss. I’ve always liked using Sword in suitable games, such as Beat Saber and Thrill of the Fight where they feel much better in the hand than the Index controllers.
SteamVR will happily switch between Sword and Index simply by turning off the active controllers and turning on the inactive controllers, they don’t require pairing each time. I tried using one Sword and one Index controller in each hand, which worked without any issues.

Overall the SteamVR faceplate was very impressive and well worth the upgrade cost of $200 (often discounted if purchased with the headset). Note that you can leave the SteamVR faceplate installed, and switch back to inside-out tracking which will bring the four cameras back online.
The 72hz mode
This has been a recent update, a most welcome one. I was failing to hit 90hz on my RTX4080 in many games, unless subsampling as the render resolution is noticeably higher on the Crystal compared to older headsets like Valve Index or Vive Pro. Subsampling (sub-resolution) is not ideal on higher resolution headsets, as it leads to a softer, less sharp image.
SteamVR reports 100% resolution on my Crystal as 4312 x 5100 per eye, whilst the large BOE 3.2” LCD panels have a native resolution of 2880 x 2880 pixels per panel. In comparison, the Valve Index’s older BOE panels have a native resolution of 1440 x 1600 with SteamVR reporting 100% resolution as 2016 x 2240 per eye.
The difference between display panel resolution and software resolution is a result of distortion correction being applied to present images correctly through each lens to the user eyeballs. Crystal also uses canted lenses (10 degrees per eye), while the distortion correction is designed to work with VR software which has been made for the majority of headsets using parallel displays.
Additionally, Crystal is not a “native” SteamVR headset, and it operates through the Pimax Play client, which causes an additional performance hit, compared to using native headsets like Vive or Index. This is not unique to Pimax, my HTC Vive Pro 2 operated through its own software layer on top of Steam, too, with a measurable impact on system performance.
Operating these higher resolution headsets with their own software layer is very taxing on your PC, meaning you may not hit stable 90hz in many games, compared to older, lower resolution, or native Steam headsets. Though 72Hz is listed as “Lab Mode”, it’s fully functional and stable when running in all software I tried including simulation, action games, and visual experiences.

This now gives the Crystal the option of 72hz / 90hz / 120hz making for a versatile headset where the user can decide what is most important: higher frame rates or higher resolution. 72Hz should also present a smooth, natural result when viewing movies or filmed media, as it’s a round multiple of 24 fps which avoids frame insertion.
For simulations and visual experiences, the 72hz mode with higher resolution is ideal, for faster active gaming the 90hz mode with a lower resolution could work better. When changing frame rates in the Pimax Play Client, the headset will automatically restart. This takes a little longer with the SteamVR faceplate as it is detected each time the headset starts.
However, I did experience a strange bug if starting in 72hz mode with a “sparkly” square in both displays, until the headset was restarted in 90hz and then switched back to 72hz. Pimax is aware of this curious bug and is looking into it, it will be addressed in a future software update.
Almalence Digital Lens OpenXR Plug-in
This was an interesting development I had recently read about. Before the end of this review, I was contacted by Eugene at Almalence, offering the opportunity to test their plug-in, “enhancing visible image quality in head-mounted displays by computationally compensating optical aberrations.”
Setup was very easy, downloading a small application and making sure to follow their setup instructions which included turning on eye tracking, and turning off dynamic foveated rendering, whilst setting render quality to “maximum” and resolution to 100% (4312 x 5100 per eye).
As described by Almalence:
“Beyond Pixel Density: The Challenge of Image Quality
In the realm of virtual reality displays, achieving superior image quality extends far beyond merely increasing pixel density. The real challenge lies in transmitting these high-resolution images through the display’s optics without any loss of clarity or introduction of aberrations. Given the inherent limitations of head-mounted displays, such as size, weight, and the dynamic nature of the eye’s entrance pupil, optimizing image quality cannot rely solely on optical design. As display resolutions soar, optical components increasingly become a limiting factor, potentially degrading the overall visual experience. Enter the Almalence Digital Lens: a dynamic optical aberration correction technology that transcends traditional physical limitations. This innovative solution significantly enhances optical performance without adding any extra bulk or weight to the headset. It effectively unlocks the full potential of high-resolution displays, literally making that high resolution visible.”

Almalence will only work with applications built using OpenXR (not OpenVR). They provided a short list of suitable applications to try, so I started with Beat Saber as it was already installed on my PC. It’s very easy to enable/disable the application using your keyboard (press delete) with insert turning the gaze indicator on or off. I did try using the application with several OpenVR games which of course did not work!
In Beat Saber turning the Digital Lens on showed a fine sharpening of the image, especially the blocks, edges of the background, and menus. I should also state that menus had reduced chromatic aberration, which was very welcome.
Toggling between on and off demonstrated the sharpening very clearly, with graphics having a slight shimmer switched off, which completely disappeared when switched on. I also tried using Almalence with DFR switched on, and had no issues in Beat Saber, in fact I’ve never seen it look so good, and it easily hit 90fps despite the ridiculous resolution (4312×5100 per eye).
(Image by Almalence)

Very impressive stuff! I tried taking images whilst running, but as it requires tracked eyes, it didn’t let me capture any images by shoving my phone camera inside the headset. Shown above are a couple of images from Almalence demonstrating their sharpening technology.
More information on this technology can be found here: https://almalence.com/pimax-crystal-turns-crystal-clear/
Additional software
As I got further into my testing, I learned of a number of additional applications built to enhance image quality and improve rendering performance. These are mainly aimed at the simulation community, where applications have heavy CPU and GPU demands, meaning even RTX4090 users can struggle with performance in flight or driving sims. I’ve listed several applications, and am currently testing them with good results.

Open Composite
Introduction by Developer Znix:
“OpenComposite OpenXR (previously known as OpenOVR – OpenVR for OculusVR – but renamed due to confusion with OpenVR) is an implementation of SteamVR’s API – OpenVR, forwarding calls directly to the OpenXR runtime. Think of it as a backwards version of ReVive, for the OpenXR compatible headsets.
This allows you to play SteamVR-based games on an OpenXR compatible headset as though they were native titles, without the use of SteamVR!
Why would you want to do this? There are several good reasons:
- Some users have trouble running SteamVR on their machines
- While more work needs to be done on OpenComposite’s side for this, it can potentially get slightly better performance due to several design decisions, due to not having to support the Vive
- OpenXR is less susceptible to the stuttering that has plagued SteamVR
- Again a problem for some people but not others, SteamVR can take some time to start up
- SteamVR is several gigabytes in side – that might be a problem for some people.”
More information on this software can be found here: https://gitlab.com/znixian/OpenOVR
Pimax XR
Introduction by Developer Mbucchia
“PimaxXR: an implementation of the OpenXR standard for Pimax headsets
This program is an implementation of the OpenXR standard for Pimax headsets on Windows. It allows you to run OpenXR applications without SteamVR. It is not produced by Pimax.
It is built on top of the official Pimax PVR native SDK and aims to provide a very fast and efficient implementation of the OpenXR standard for Pimax headsets.”
More information can be found here: https://github.com/mbucchia/Pimax-OpenXR
Open XR toolkit
Introduction by developer Mbucchia
“This software provides a collection of useful features to customize and improve existing OpenXR applications, including render upscaling and sharpening, foveated rendering, hand tracking to controller input simulation, image adjustments and other game-enhancing tweaks.”
More information can be found here: https://mbucchia.github.io/OpenXR-Toolkit/
Quad Views
Introduction by developer Mbucchia
“Quad Views rendering, sometimes referred to as “multi-projection” or “dynamic projection”, is a rendering technique that an application may use to implement foveated rendering. This software lets you use Eye-Tracked Foveated Rendering (sometimes referred to as Dynamic Foveated Rendering) with your Pimax Crystal, Meta Quest Pro, and other headsets supporting eye tracking via OpenXR in games using the quad views rendering technique like Digital Combat Simulation (DCS) and Pavlov VR.”
(Image by Pimax)

More information can be here: https://github.com/mbucchia/Quad-Views-Foveated/
Pimax’s blog also gives a great article explaining how Quad Views works, and how to set it up on your Crystal: https://pimax.com/quad-views-foveated-rendering-for-pimax-crystal/
Rounding off this article, I was lucky enough to have an opportunity to ask some questions directly of Pimax, with a number of their hardware experts stepping forward to provide some answers.
Q&A with Pimax
- Where did the idea of Crystal originate? Pimax has always been pushing innovation in the VR industry. That’s not just some PR talk. We had the first 4K headsets in 2015, and went to 8K later, with a massive 200 degree FOV. But it’s still hard to put ultra-high clarity together with super-wide FOV. So whereas the 8KX uses wideFOV, the Crystal focuses on ultra-high clarity (and the 12K will be the merging of both those aspects…). Anyway, one of the key aspects of the Crystal — from the get-go — was glass aspheric lenses. We believe that once you go above 30 PPD, you should really opt for glass. And the Crystal with its high-res QLED panels does. The glass lenses are brighter, and sharper and allow the user to see all the details of the panels. And glass is also why it’s named Crystal.
- How long did the development of the hardware take? Is it difficult to manufacture? The Crystal in a way is the logical evolution of the previous headsets, so there are some parts that we could build on — but the development took several years.
- What were the trickiest challenges to overcome during development? The glass lenses. Not just the distortion profiles, but especially making them. No manufacturer in VR has used glass lenses in their headset before. Ours come from our design from a supplier that also makes lenses for photography camera brands such as Leica, Olympus, Nikon, and Sony. But VR lenses are bigger than camera lenses, so yeah that was the biggest challenge.
- Can you tell me more about the design of your aspherical glass lenses? The glass aspherical lens on the Pimax Crystal contains only a single glass element in addition to the single glass dust filter in the headset. This means that light can only pass through four air/glass barriers. Since only one lens controls the light, we had to use very high-quality lenses with a well-adjusted distortion curve. The advantage is that most of the light intensity is preserved and we can produce brighter images with less color shift.
- How are the lenses manufactured? The glass lens manufacturer uses our design, starting by using square blocks of glass as source material. That is heated and put into a mold. This mold is also pretty expensive to make with dozens of coatings and layers. It is then tuned to the shape that fits in the Crystal (not a perfect circle), and by hand fine-tuned to the perfect shape. It’s then cooled and coated. Those lenses then go to our factory where we add the outer edge with the infrared lights for eye tracking, the chip for lens detection, and the magnets for easy placements on the Crystal. FYI, we are making a video about how our lenses are manufactured in the factory and it should be published in the next two to three weeks. This video will also show the difficulties of the process, but Pimax still chooses to go for glass lenses because glass for lenses is just a superior material compared to resin. We want to bring the best visual experience to VR users.
Logan from Pimax (Image by Pimax)

- Can you tell me more about the development of your inside-out tracking? It’s much improved since its launch! First, we have a top software development and algorithm team. We made full use of camera and IMU data by using graph optimization, improved tracking speed, and tracking effect in corner cases. Deep learning improves the effect in some scenarios. The synchronization accuracy between the controllers and the headset improves controller tracking robustness. We keep optimizing the inside-out tracking, not just the accuracy, but we’ve also improved the battery life of the controllers a lot (related to the tracking algorithm).
- The Crystal controllers are very different from your Sword controllers, what led to this? The Crystal controllers work together with the inside-out tracking. In the teardown video, we mention the buttons are tracked with a Wi-Fi antenna, and the position with an IMU chip, as well as the infrared rings on the controllers. The camera of the Crystal headset tracks those rings, so the controllers had to be designed fundamentally differently than the Sword controllers, which are tracked by base stations.
- how does the backlighting work? What differences do the settings make? Pimax calculates the image brightness of each area according to the soft algorithm and controls the backlight brightness of each area by this brightness value. Thus, the brightness of the image is correlated with the brightness of the backlight to achieve the best contrast and reduce the power consumption of the backlight. Differences that settings make: Pimax set different threshold ranges for different levels. Because each person’s sensitivity to brightness is not the same, the perception of the overall picture is also different. The user through the setting of the level can have more choice space to find the most suitable for their own backlight brightness.

(Image by Pimax)
- How does the quantum dot layer work? This layer can help raise colour gamut.
- How many charges can the batteries take? Like any battery, it’ll get less efficient over time, but it can ensure that after 500 charging cycles, the power can be maintained at more than 80%
- Are replacement batteries available as spare parts? The standard package contains two batteries. Do you mean beyond that? We are planning on it, users can purchase it separately.
- What is the resolution of the standalone mode? The physical resolution is 2880 x 5760.
- Is the mirrored layer in the eye tube (under the removable lens) for eye tracking? This one serves two purposes. One for eye-tracking yes; it reflects the infrared lights on your eye into the Tobii eye-tracking sensor. It also doubles as protecting the QLED panel from any dust. You can easily clean the mirrored layer. No dust or dirt can reach the QLED panel.
- Does eye tracking provide the full range of eye data? (Gaze direction, pupil diameter, blink / eye openness, et ) We use Tobii eye-tracking and even though the hardware is capable of full details such as pupil diameter, it isn’t needed for DFR to work accurately — so we do not use the Ocumen license.
- Any thoughts about a custom face cushion in the future? (Similar to Bigscreen Beyond) Although a custom face cushion has benefits such as a great fit for users themselves, it isn’t helpful for users who want to share the headset with family or friends, or in enterprise situations. Our standard face cushion shape is designed deliberately to enable it to fit most users’ faces. Currently, we have no plans for this but we shared 3D files for whoever wants to print their own mask: https://pimax.com/pimax-crystal-3d-printable-model-for-modding/
- Can you tell me more about the wide FOV lenses? How are these different from the 35 ppd? Some users — especially those with an 8KX — would like to have Crystal to have more FOV, even though it already has some of the widest FOV in the market (and helped with edge-to-edge clarity on the lens). The big FOV lenses have more than 10% larger horizontal FOV than the standard FOV lenses. We are still perfecting those lenses and waiting for the final specs confirmation.
- How will the wireless PCVR mode work? Will SteamVR mode work with wireless mode? Via our WiFi 6 and 60G Airlink module. It’ll stream in Standalone mode, but you can play games through SteamVR yes. It still adopts inside-out positioning and controllers You can watch the demo here:
- Is there something unusual about the Crystal that you can share with our readers? Glass aspheric lenses. Crystal is the only VR headset that uses glass lenses. Highest resolution in consumer VR headsets, on par with Apple Vision. Dual mode. Although our standalone mode is not mature enough in terms of ecosystem and software now, it is the foundation of our wireless PCVR module (60G Airlink and WiFi 6E) to set tethered VR gamers free. Crystal also supports the MR faceplate (coming soon). With this faceplate, users can see their surroundings accordingly. It is especially beneficial to flight/racing simmers who need to see the cockpit.
Many thanks to Logan, Otto, and Tony at Pimax for their time in answering my questions, and sharing their expert knowledge with our readers.
Conclusion: The updated Crystal experience
Compared to my earlier experiences, overall things have much improved. Once I solved my ergonomics issues, the Crystal became much more comfortable and stable. I quickly adjusted to the weight of the headset, not finding it a problem even for longer sessions.
Updated software unlocking many desirable features has allowed the Crystal to start to shine. The most important two features for me were eye tracking and the SteamVR faceplate.
The inside-out tracking system saw genuine improvements and was more than suitable for simulator users and many different games. The headset tracking was always very competent, and controllers worked much better than during my early testing, especially for occlusion when playing shooting games where one hand is placed in front of the other.
However, as someone using Lighthouse base station tracking for many years, the sub-mm precision from highly accurate SteamVR tracking has noticeable benefits for strong feelings of presence in VR, and once you get used to the “gold standard” of VR tracking it is hard to go back. I also found that using SteamVR tracking helped offset the lower frame rates I could achieve (compared to my Index), making for a more comfortable and present experience.
As Stanford Professor Jeremy Bailenson said in his recent interview with Skarredghost when asked about this issue, “There’s a joke I tell at cocktail parties, and it’s not really a joke because it’s not funny at all, but if you’re going to ask me, what are the five most important features that cause presence in VR? My answer for you is going to be tracking, tracking, tracking, tracking, tracking.”
Combining the high-resolution clarity of the Pimax Crystal with the precision of SteamVR tracking makes for an amazing VR experience I couldn’t replicate in other headsets. As time went on, I used my Index headset less frequently, choosing to put on the Pimax Crystal. As someone who was an Index launch day owner, and has spent hundreds of hours over four years using an Index, this was quite a paradigm shift.

As Crystal matures with bugs being ironed out and new features enabled, and community-built software is providing enthusiasts with precision tools to maximize their enjoyment, it has to be said that Crystal has finally come good.
Should the Crystal have the battery, the XR2 processor, the wireless chip, and other components that undoubtedly add bulk and weight? Some have commented that Pimax should release a stripped-down version with SteamVR tracking and no battery, onboard processor, or standalone mode.
I’m not here to make this judgment but to assess the Crystal as we find it today, it’s a very versatile product that has its own inherent value. Yes it’s heavier and bulkier, and you will need to change that battery, but they’ve built something that has unprecedented visuals, great sound, and a fully functioning software platform that offers a fine degree of control to the power user.
Airlink (Image by Pimax)

Being able to use inside-out tracking for simulator sessions, SteamVR tracking for room-scale games, or standalone mode when you feel like freeing yourself from the PC and its tether, is a very neat proposition.
I cannot wait to try out further developments like the new head strap, wide FOV lenses, and the 60G Airlink wireless module. The wide FOV lenses expand the horizontal field of view, but are taking time to get right as Pimax mentioned in the Q&A, beause lens design is a complicated business.
The replaceable lens design is a big bonus in this respect, but perhaps more importantly (as the 35ppd lens is great) will prevent the headset from being written off due to lens damage. There is nothing worse than scratching a lens, rendering a headset useless, but this will never be an issue with the Crystal.
As with other features on the Crystal, the wireless chip is already built into the headset (see the image above), but requires a software update and a small dongle that plugs into the top USB-C port. Pimax has been testing the wireless module for some time, getting it dialed and ready for release to the public. Since HTC’s Vive wireless adapter is bandwidth limited with obvious results on Vive Pro 2, and Nofio still hasn’t released their adapter for Index, Pimax will have something unique here for PCVR users.
Many thanks to Pimax for the long-term loan of the Crystal, their ongoing technical support, and most importantly for bringing this interesting headset to market with its amazing visuals and versatile modes of operating. Thanks, Pimax, and happy 8th Anniversary!
My thanks to: Pimax crew especially Daisy, Logan, Tony and Otto, Tony Skarredghost, Eugene at Almalence, and Sara Ramos for the photos; finally my thanks to you the reader for making your way through this small book.
Disclaimer: this blog contains advertisement and affiliate links to sustain itself. If you click on an affiliate link, I'll be very happy because I'll earn a small commission on your purchase. You can find my boring full disclosure here.