Updating your BIOS can bring all sorts of benefits, from improving stability, adding compatibility for new processors and memory types, and even improving performance. Motherboard manufacturers often release BIOS updates for a few years after a motherboard is launched, so it's always worth checking their support site to see if there's a new firmware available.
Here are a few tips on how to update your BIOS so you can do it safely.
NOTE: Updating your BIOS is not a very difficult task, but it is quite risky. In case the process is interrupted or fails for some reason, you could end up with a bricked motherboard. Thus, it is advised to be extra cautious while updating your BIOS.
How to update your BIOS
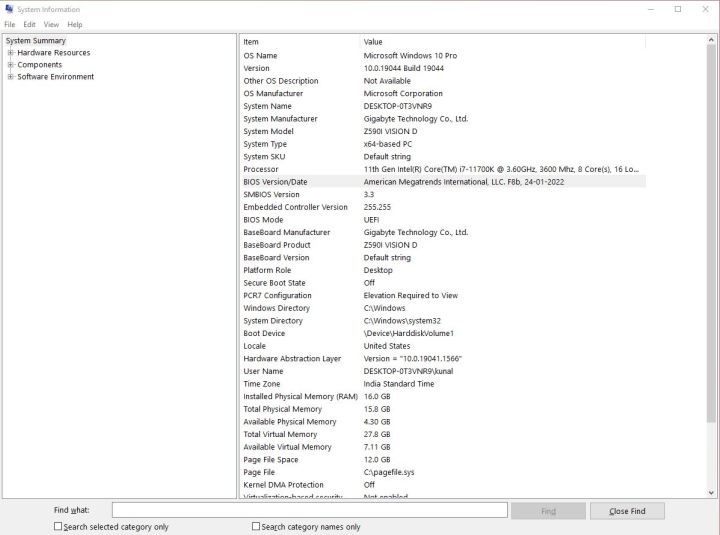
Step 1: Before you update, make sure that you are installing a new BIOS version by comparing it with your current version. To do so, head over to the Windows Search bar or simply open the Windows Start menu, type ‘msinfo’, and hit enter to open System Information. Note down the BIOS version which should be right under your processor information. In case you don’t know the exact model of your motherboard, you should see it listed as System Model.
Step 2: Head over to your motherboard manufacturer’s official website (in our case it is Gigabyte) and find the support page for your motherboard model. The support page should include a Downloads section that will include various drivers, software, and utilities. Look for the BIOS section and download the latest version that is available for your motherboard.

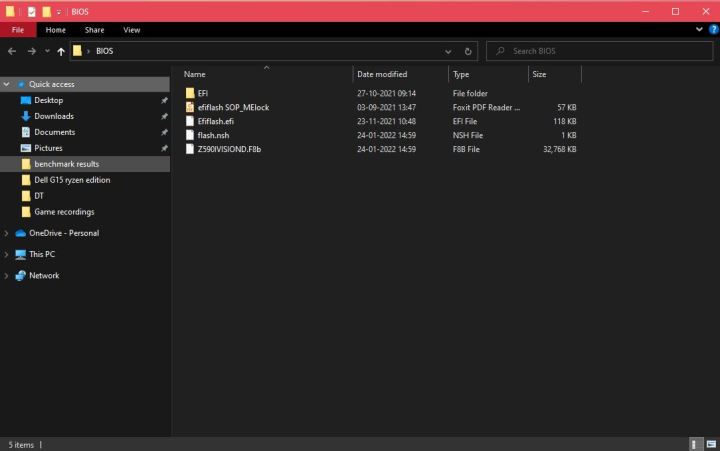
Step 3: In case the downloaded file is in ZIP or RAR format, extract it using any compression software. You should now have the new BIOS firmware file along with additional files for flashing it. Copy all the files onto a USB thumb drive. Make sure you copy them into the root directory of the drive.
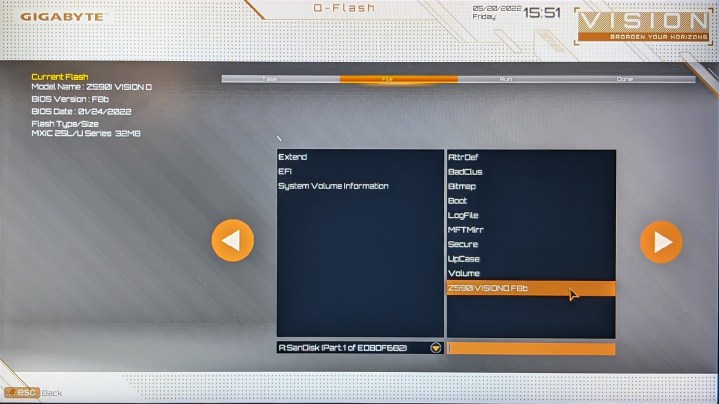
Step 4: Reboot your system and enter the BIOS. The correct key to enter the BIOS should be listed right when your system boots, but there are a few generic options you can try, such as F2 and Delete. Once you have entered the BIOS, look for the BIOS or UEFI flashing tool. Certain motherboards have it under Q-Flash. In case you have a fairly older motherboard, search for the option to flash or update BIOS as there might not be a dedicated utility.
Step 5: Once you open the BIOS flashing utility/setting, it is recommended that you back up your existing BIOS firmware. This is critical in case something goes wrong during the flashing of your new firmware. The ability to back up the existing BIOS is not available on all motherboards, but in case your BIOS/UEFI flashing tool offers the feature, do perform a backup and save it onto a USB drive.
Step 6: We can now begin the update process by selecting the new BIOS firmware file that you downloaded and copied onto the USB drive. Be very careful in selecting the correct file. Once the flashing process begins, it is crucial to ensure that your system is not switched off in any circumstances.
Step 7: After finishing the flashing process reboot your computer. The BIOS of your PC should now be updated to the latest version.
Editors' Recommendations
- How to take a screenshot on a Mac
- How to share your Outlook calendar
- How to delete Google Chrome on Windows and Mac
- How to run a free background check
- How to right-click on a Chromebook