Your iPhone comes with a nifty feature that locks out strangers if they input the wrong password too many times. This is a great safety tool to keep your device away from prying eyes and to ensure someone doesn't randomly guess your password through multiple sign in attempts.
However, it can also be a nuisance. If you're in a hurry or just waking up in the morning, entering the wrong password multiple times will get you to the same "iPhone Unavailable" message.
There might be other reasons the message pops up, but there's almost always an easy way to fix your iPhone and get back to scrolling through Twitter or Reddit without much downtime.
The "iPhone Unavailable" (or "iPhone is disabled" or iOS 14 or older phones) message only appears after at least five failed attempts to enter your passcode. Although this can happen by accident, it's relatively uncommon as the iPhone's capacitive touchscreen only responds to skin contact, so you'd have to end up accidentally tapping your iPhone's screen several times in the right places while fumbling around for something in your bag or pocket. So, if you pick up your iPhone and find it in this state, there's a good chance somebody else was trying to get into it.
The amount of time your iPhone will remain unavailable depends on how many passcode attempts have been made. It locks you out for one minute after five attempts. A sixth attempt increases that to 5 minutes, followed by 15 minutes after a seventh, and finally one hour for each subsequent attempt.
After entering ten wrong passcodes, your iPhone will lock down completely, refusing any further passcode attempts. You'll either see "Security Lockout" (iOS 15.2 or newer) or a connect to iTunes alert (iOS 14 or older), or if you've enabled the Erase Data option in Settings > Face ID & passcode (Touch ID & passcode for an iPhone SE or other home-button equipped device), your iPhone will automatically wipe itself and restart with its out-of-the-box factory settings.
There is no way to unlock your iPhone without knowing the correct passcode. Even Apple can't do this for you, so if you're certain you've forgotten your passcode, the only way to regain access is to erase everything on your iPhone and return it to factory settings.
This ensures that all your sensitive data remains safe no matter what, but the good news is that if you have a recent backup — either in iCloud or on your Mac or PC — you can be up and running again in a couple of hours. While your device backup contains all of your important data, it doesn't include your device passcode, so you can set a new one after restoring it.
Note that if you're using an eSIM, this will be erased as well. You will need to contact your mobile provider to get this set up again after your iPhone has been restored to factory settings.
How to fix the 'iPhone Unavailable error' (iOS 15.2 or newer)
If you're using iOS 15.2 or newer — as you'll find on an iPhone 14 or iPhone 14 Pro — you can wipe your iPhone and start over fresh at any point after the "iPhone Unavailable" screen first appears to bypass the requirement for any other tools like a computer or web browser. If you're sure you've forgotten your passcode, this is the easiest way to get up and running again without having to work your way through two or three hours of password attempts.
Your iPhone must have an active cellular data or Wi-Fi connection to complete these steps. Don't restart your iPhone when it's in this state as it won't reconnect to a Wi-Fi network until it's successfully unlocked.
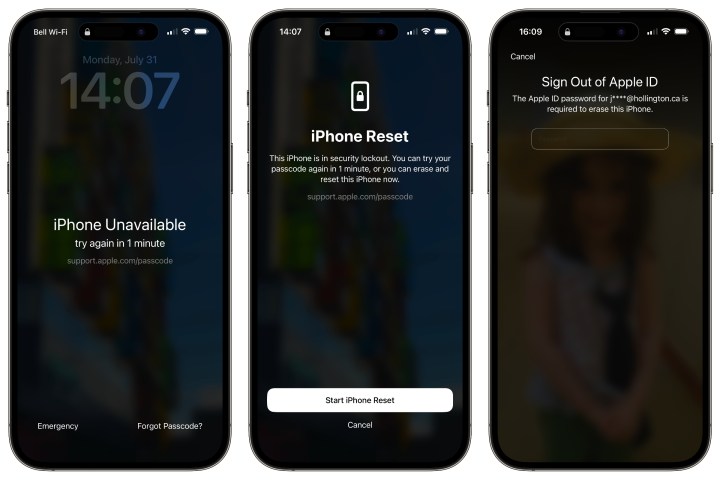
Step 1: From the "iPhone Unavailable" screen, select Erase iPhone (iOS 15/16) or Forgot Passcode? (iOS 17 or newer). Depending on your iPhone and Apple ID settings, this button may not appear. In this case, proceed to the sections for fixing a disabled iPhone via iCloud or using a Mac or Windows PC.
Step 2: On the Security Lockout screen, select Erase iPhone Forgot Passcode? again to confirm.
Step 3: Enter your Apple ID password on the next screen.
Step 4: Select Erase iPhone to confirm.
Your iPhone will be wiped and returned to factory settings. You'll need to go through the same initial setup process as when it was new, although you can choose to restore your most recent iCloud backup when prompted to return your iPhone to the state it was in as of your last backup. If you're using an eSIM, you may need to contact your carrier to get this set up again unless the carrier supports automatic eSIM Carrier Activation.

How to fix the "iPhone is disabled" error (iOS 14 or older)
If your iPhone is running iOS 14 or older, you won't be able to wipe it directly without going through all ten failed passcode attempts until it automatically wipes itself — assuming the "Erase Data" option was enabled.
If you don't have the "Erase Data" setting enabled, your iPhone will go into a security lockout mode, and you'll need to go through the manual steps described in the sections below anyway. So, you might as well jump to these steps and wipe your iPhone as soon as you're sure you've forgotten your passcode. As long as you have a recent backup you can be up and running again much more quickly.
How to fix a disabled iPhone or iPad via iCloud
As long as you've enabled Find My iPhone, which should be on by default, you can remotely erase your device, either by logging into iCloud with a web browser or using the Find My app on another device such as an iPad or Mac.
Step 1: Using any web browser, visit icloud.com/find and sign in with your Apple ID and password. A map of your device locations will appear.

Step 2: Select All Devices from the top of the screen.
Step 3: From the list that appears, select your disabled iPhone. The map will zoom in on your chosen device.
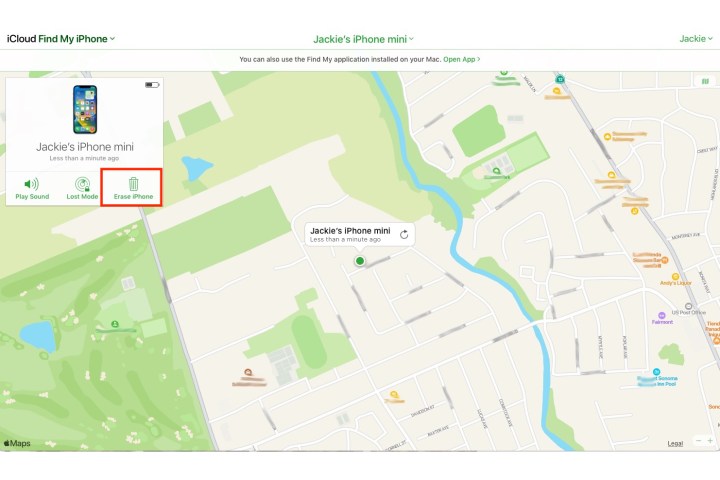
Step 4: Select Erase iPhone from the device window that appears.
Once your iPhone has been fully erased, it will restart in an out-of-the-box configuration and you'll have to go through the setup process again. Note that this doesn't disable the Activation Lock feature, so you will need to enter your Apple ID and passcode before setting up your iPhone to confirm that you're the actual owner. Once you've done that, you can complete the setup process and choose to restore a backup from iCloud or your computer or set your iPhone up as brand new if you prefer to do that instead.
How to fix a disabled iPhone using a Mac or Windows PC
While using iCloud's Find My page is the easiest way to wipe your iPhone, it only works if you had Find My iPhone enabled in the first place. Fortunately, you can also restore a disabled iPhone with the help of your computer, using either iTunes on Windows or macOS Mojave or earlier or the Finder app on macOS Catalina and newer versions.
Step 1: Launch iTunes (Mac/PC) or open the Finder (Mac), but don’t connect your device just yet.
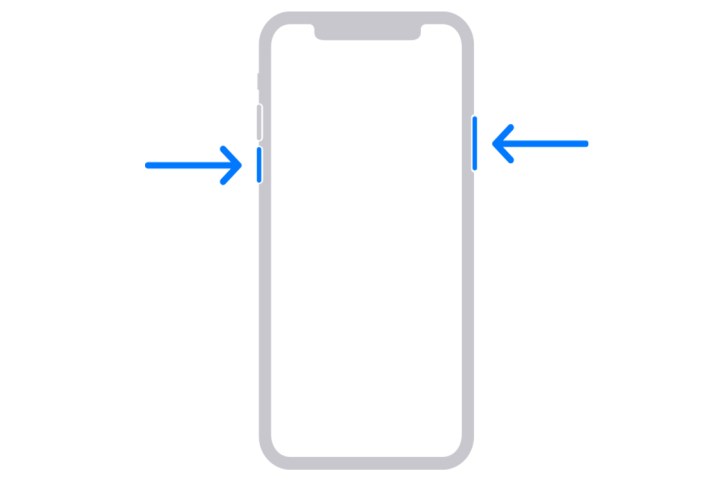
Depending on your iPhone model, you'll need to either press and hold the Side button or the Side button and either Volume button until you see the Power off slider. Then relaunch your iPhone in Recovery Mode.
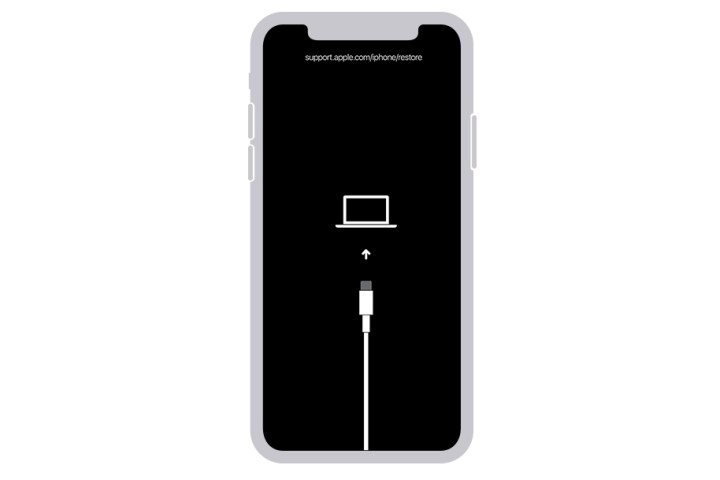
Step 2: For the iPhone 8, iPhone 8 Plus, iPhone SE (2020/2022), or iPhone X and later, or later: Press and hold the Side button and one of the Volume buttons until you see the Power off slider, then turn off your device. Connect your device to your computer while holding the Side button, and keep holding until you see your phone's Recovery Mode screen.
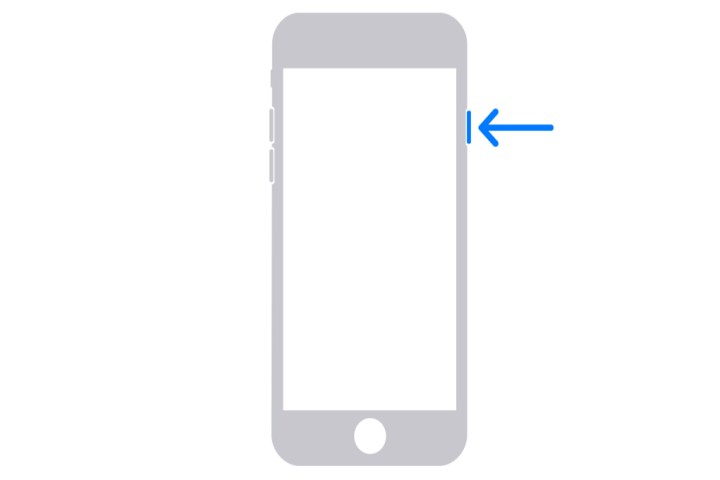
Step 3: For the iPhone 7 and 7 Plus: Press and hold the Side button until you see the Power off slider, then turn off your device. Connect the phone to your computer while holding the Volume down button, and keep holding until you see the phone's Recovery Mode screen.
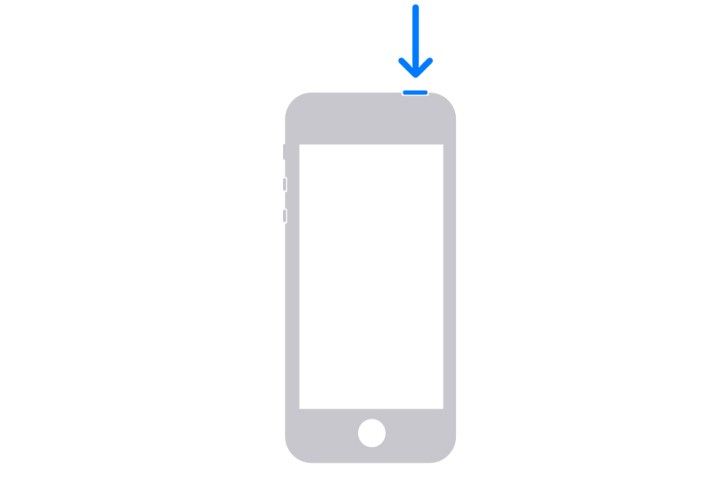
Step 4: For the iPhone 6S or earlier and iPhone SE (2016): Press and hold the Side button or Top button until you see the Power off slider, then turn off your device. Connect your device to the computer while holding down the Home button and keep holding until you see the phone's Recovery Screen mode.
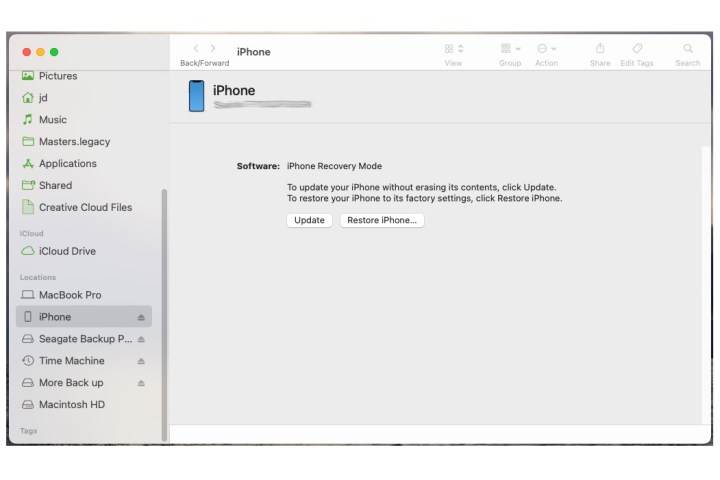
Step 5: Launch the latest version of Finder or iTunes, as appropriate. It should automatically detect your iPhone, allowing you to select your iPhone name from the side menu.
Step 6: When the option to Restore or Update appears, choose Restore.
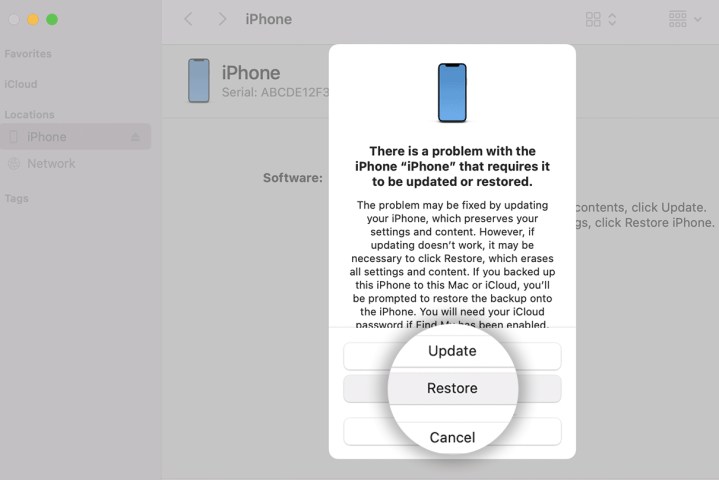
Step 7: Proceed with a new setup, enter a new passcode, and you’re good to go. This will erase all data on your iPhone.
Once the process completes, your iPhone will be returned to its out-of-the-box factory settings, and you can proceed to set it up and restore a backup from iCloud or your computer when prompted.
Avoiding a disabled iPhone message
The best way to get rid of a disabled iPhone error alert is to avoid getting one in the first place. There are a number of strategies you can use to prevent accidental lockouts.
Step 1: Set a numeric passcode that is easy to remember and that no one else knows or is likely to guess. No mistakes mean no error messages.

Step 2: Use Touch ID (for iPhones with home buttons, from 5S through iPhone SE 2022) or Face ID (for iPhone X and later and iPad Pro models).
Even with these unlock options, your device still has a passcode — you just don't need to worry about entering it as often. Instead, just look at your phone screen or tap and hold your finger and your device unlocks.
Keep in mind that biometric security options are about convenience, not security. Anybody can still unlock your iPhone with a standard passcode, and your iPhone will prompt you to enter your passcode once in a while for extra security and to ensure that you don't forget it. However, since you won't need to enter it nearly as often, you can choose a more complex passcode or even an alphanumeric password — just be sure it's something you remember, as you'll still need to enter it sometimes, and your Face ID and Touch ID won't help if you've forgotten it.
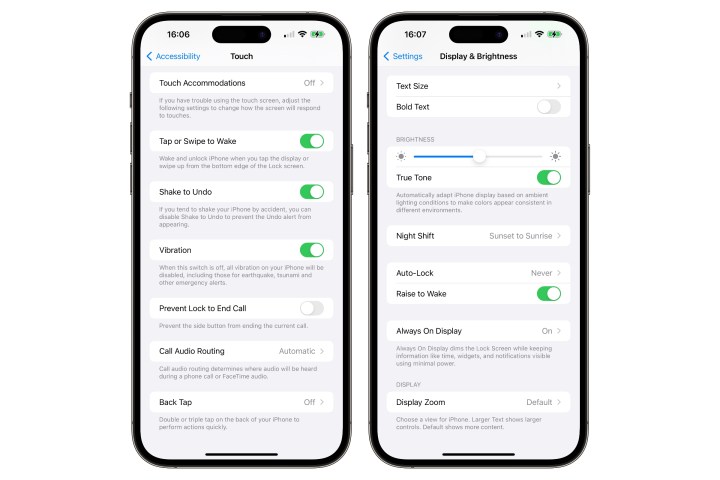
Step 3: While it's pretty uncommon for other things touching your screen to result in lockouts, you can avoid this entirely by disabling the "Tap to Wake" and "Raise to Wake" settings that automatically turn on your screen. Here's how to find these settings:
- Go to Settings > Accessibility > Touch and switch off Tap or Swipe to wake.
- Go to Settings > Display & brightness and switch off Raise to wake.
Editors' Recommendations
- Here’s how iOS 18 is going to overhaul your iPhone’s email app
- Be careful with your iPhone! Repairing it just got more expensive
- Apple just admitted defeat to Android phones
- Have an iPhone that won’t turn off? Here’s how to fix it
- Google is making it easier to ditch your iPhone for an Android phone