With Keynote on Mac, you can create brilliant presentations for business, education, and even personal projects. But not everything goes as planned when you build a slideshow. You may add an image, type text, or make a formatting change that you wish you hadn’t.
With the Undo feature in Keynote, you can erase your last action. Whether you add an element you want to immediately remove or make a formatting change that doesn’t work out, Undo is your digital eraser in Keynote.

Undo your last action in Keynote
If you want to undo the last action you performed in Keynote on Mac, select Edit > Undo in the menu bar.
To confirm you’re undoing what you intend, you’ll also see what that last action was. As an example, if you just typed a word, it would show Undo Typing; if you deleted an image, it would show Undo Delete.
When you select Undo, you should see that the last action is undone.
If you prefer to use a keyboard shortcut instead of the menu bar, press Command + Z to undo an action.

Undo your last several actions
The Undo feature in Keynote isn’t just a one-time eraser. You can continue to undo previous actions.
For example, let’s say you insert a shape and then type text inside of it. When you select Edit, you’ll see Undo Typing because that was the last action. If you select that and then go back to Edit, you’ll then see Undo Insert because that action came before the typing.
The key is that you can continue to undo each previous action in order. However, you cannot jump to specific actions in between.
If you use the keyboard shortcut mentioned above, Command + Z, you can continue to press this key combination to undo each action in order.
Redo your last action in Keynote
The counterpart to Undo in Keynote is Redo. Redo is like the eraser for the eraser that lets you redo something you just undid.
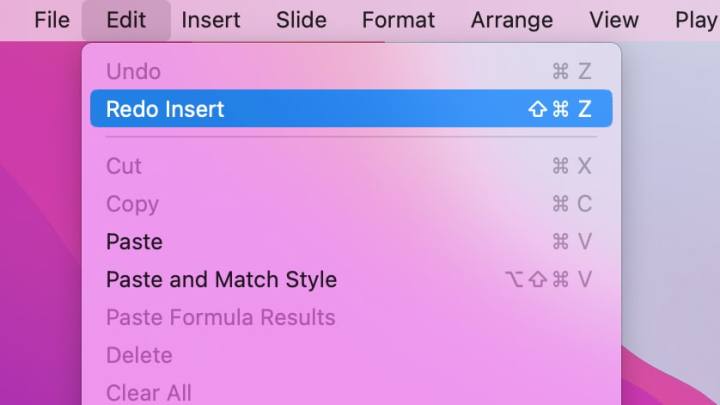
For instance, let’s say you insert a table on your slide, change your mind, and select Edit > Undo Insert to remove the table. You can then go to Edit > Redo Insert to put the table back.
Redo works just like the Undo feature. You’ll see the last action next to it in the menu and can continue to redo each action you previously undid.
If you prefer to use a keyboard shortcut instead of the menu bar, press Shift + Command + Z to redo an action. Like the keyboard shortcut for Undo, you can continue to press this key combination to redo each action in order.

Undo or Redo grayed out?
If you select Edit in the menu bar with the intent to undo or redo an action and one or both are grayed out, there’s a reason: There are no further actions to undo or redo.
Additionally, if you close your presentation and reopen it, you won’t have the Undo or Redo options until you perform a new action. You can save your presentation and still use Undo or Redo, but once you close the slideshow, you’ll start a new set of actions when you reopen it.
Editors' Recommendations
- How to delete messages on your Mac
- How to double space in Microsoft Word
- How to type an em dash on a Mac
- How to find a Wi-Fi password on Mac
- How to forget a network on a Mac