
Fire Emblem Warriors: Three Hopes: All document locations

In between hacking and slashing your way through wave upon wave of enemies in Fire Emblem Warriors: Three Hopes, there’s no shortage of things to do back at your base. Most of the time, you’ll be spending this downtime interacting with the other members of your chosen house, upgrading your facilities, or generally preparing for your next mission. While all of these are important, there are some optional tasks that you can do that may not give you a material reward but certainly help you better understand the world of Fire Emblem Warriors: Three Hopes.

Documents are a special collectible that is unique depending on which house you pick: Black Eagles, Blue Lions, or Golden Deer. There’s a set of three or four per house, and each of them gives you a deeper look into the lore of the game. For anyone who fell in love with the world and characters back in Fire Emblem: Three Houses, these documents will certainly be an interesting read. First, you need to find them, though, so here’s the location for each one in Fire Emblem Warriors: Three Hopes.

Further reading

All Black Eagles document locations

Shez runs around a hub in Fire Emblem Warriors: Three Hopes.
Image used with permission by copyright holder

Empire Noble I

The first document you can find in the Black Eagles path can be picked up early in Fire Emblem Warriors: Three Hopes when you are given the task to go to the headquarters and talk to Edelgard. Right on the main dining table, you will spot the document glowing blue.

Imperial Territories of Adrestia: Book One

Once you’ve spoken to Edelgard after getting the last document, go over to the chapel in the north. The document is right on the main altar.
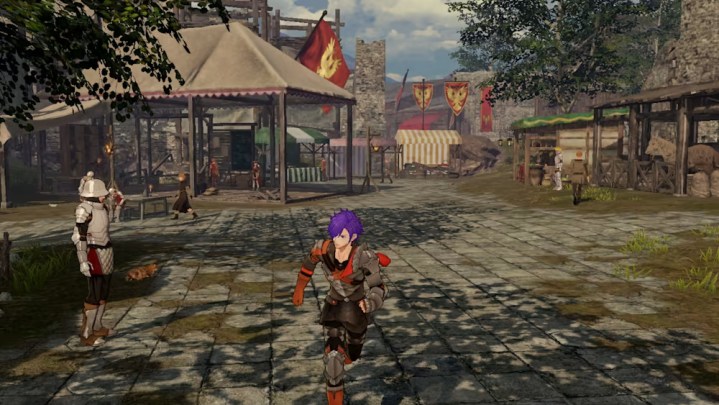
Report on Abyss

Our final Black Eagles document is near the shopkeeper located on the east side of the map. Just to the right of the shop itself, you can grab this report from atop some crates.

All Blue Lion document locations

Exquisite Old Letter

Our first Blue Lion document pops up while going through the Unrest in Fhirdiad mission. One part will give you the objective of going to speak with Dedue. Right behind him, on top of a nearby box, is the letter.

Kingdom Nobles

After progressing a bit further and talking to Dimitri, go into the main hall of the headquarters and look on the end of the long dining table. This one is in the same spot as it would be in the Black Eagles path.

Letter from an Abyss Resident

Right after the previous document, go straight over to the shopkeeper on the east side of the map. Again, this one is in the same spot as you’d find it in your Black Eagles path on some crates.

Royal Territories of Faerghus: Book One

The only path with a fourth document, we’re going back to the chapel to grab this book off the altar.

All Golden Deer document locations

Alliance Nobles

First up, we’re back in the headquarters while on the mission to check out the camp. Yet again, this one is waiting right on the big table.

Allied Territories of Leicester: Book One

Time to go back to the church where, once more, you can grab an easy document off the altar.

Letter from the Abysskeeper

Can you guess where this last document is? If you said, “On some crates next to the item shop on the east side of the map,” then you’re absolutely right. Snag it for your final piece of lore.

Editors' Recommendations

Jesse Lennox
Jesse Lennox loves writing, games, and complaining about not having time to write and play games. He knows the names of more…
All Legendary Pokémon locations in Scarlet and Violet: The Indigo Disk
Three legendary Pokemon stand tall in Pokemon: The Teal Mask.

Even if you're not the type of trainer who wants to completely fill out their Pokédex, basically everyone is drawn to catching the Legendary Pokémon. These are some of the most powerful and iconic monsters in the series, and with the final DLC for Pokémon Scarlet and Violet, called The Indigo Disk, adding in the last batch for generation nine, there's even more to hunt down around Blueberry Academy.

Unlike older titles where you just needed to go hunt down these majestic Pokémon, this time the process is a bit more complicated. Get your Pokéballs ready because we have some Legendaries to catch!
How to find every Legendary
Legendary monsters won't show up at all in The Indigo Disk until you've completed the main story and begun the postgame. Once you've rolled credits, head back to Blueberry Academy and speak to the Director to get a small tutorial on Special Coaches. Once that's over, he will also tell you about a mysterious man outside the academy. This is Snackworth, and will be the one to direct you to the Legendary creatures.

Read more
All Ancestor Skill locations in Avatar: Frontiers of Pandora
An Ikran flies towards a ship in Avatar: Frontiers of Pandora.

After being raised by humans up until the start of Avatar: Frontiers of Pandora, your Na'vi has a lot to learn about where they come from and their lost heritage. Part of that is learning how to actually survive and navigate Pandora, but another major aspect is learning new skills. You have your standard five skill trees to invest points into, as well as a set of 12 Ancestor Skills that you can't get by normal means. These skills are far more meaningful when it comes to adding new gameplay options, and can only be obtained by hunting down specific plants to connect with on the map. It's a big world out there, Na'vi, so call your ikran (a dragon-like creature) and we'll guide you through the wilds to the location of every Ancestor Skill.
Where to find all Ancestor Skills
You will get the first Ancestor Skill early on in the game as part of the main story, which unlocks a short double-jump ability. The remaining 11 are completely optional as to whether or not you go out of your way to find them. We recommend waiting until you get your ikran before going after any skills other than the first as the ability to fly will not only make the process infinitely easier, but some skills can't be reached without it.

1. Eject
Eject makes short work of those dangerous RDA soldiers piloting power armor suits by letting you rip them right out of the cockpit. You do have to get close enough to do it, though, so be careful.
2. Drop Impact
Melee attacks are already strong considering you're a giant Na'vi, but you can make them downright deadly with this skill. Any jumping attack you do gets a damage multiplier, up to a maximum of 3, depending on how fast you're running when you melee in the air. As a nice little cherry on top, any nearby enemies also get staggered when you pull off this move.
3. Deeper Connection
Get in touch with your ikran and strengthen your bond, which gives it more stamina for whatever reason.
4. Soft Landing
Falling to your death is a real concern on Pandora. You're constantly climbing trees, mountains, and even floating islands. While it won't save you from a fall from the latter, Soft Landing lets you slide after a long fall to avoid breaking a leg.

Read more
All hidden chest locations in Super Mario RPG
Toad explaining Hidden Treasures to Mario.

The remake of the SNES game Super Mario RPG is about as faithful as any fan could hope for. The classic characters, locations, combat mechanics, and music are all back in a new and charming graphical style. While there are a few new tweaks and additions here and there, for the most part, the world is just as you remember from your childhood. That includes those tricky Hidden Chests. Just like in the original, a special set of hidden chests are waiting to be found all across the game world, but for those who haven't played the original, you may go most (if not the entire) game without finding them. Hidden chests, in this case, are actually invisible until Mario jumps up and activates them. Mario is a superstar jumper, but even he would get tired of jumping everywhere possible in search of these secret chests. We'll point out where to find all 39 Hidden Chests in Super Mario RPG so you can reap the rewards without pulling your hair out while trying to find them.

We will list every Hidden Chest in the order you should naturally come across them as you're playing the game so you can follow along. However, if you've already missed some, none of them are missable, so you can always backtrack to get any you might have accidentally passed by. You should also equip the Signal Ring to alert you when a Hidden Chest is in your area.
Hidden Chest 1

Read more