Oculus Quest Mixed Reality Capture Tools Tutorial for Beginners
Today I host a guest post from Alex Gonzalez, that will teach you how to record mixed reality videos for the Oculus Quest. Alex is a very smart VR enthusiast and professional, that is growing very well inside our ecosystem. He started his own venture in shooting mixed reality videos for companies working in the enterprise sector, and his services are being very appreciated: I’ve seen some of his videos or GIFs become pretty popular on Linkedin and Reddit, with dozens of thousands of views.
I’m so happy that he has proposed me to write this tutorial for this blog, so that every one of you that wants to create a mixed reality video for his/her own Oculus Quest application, can do it pretty easily. This can help all you startups and indie developers in performing a better promotion of your product.
If you instead need someone else to shoot for you a more professional video, you can contact Alex directly on his website (and for other VR services, you can get in touch with us at New Technology Walkers).
That said, let’s all enjoy this cool tutorial!
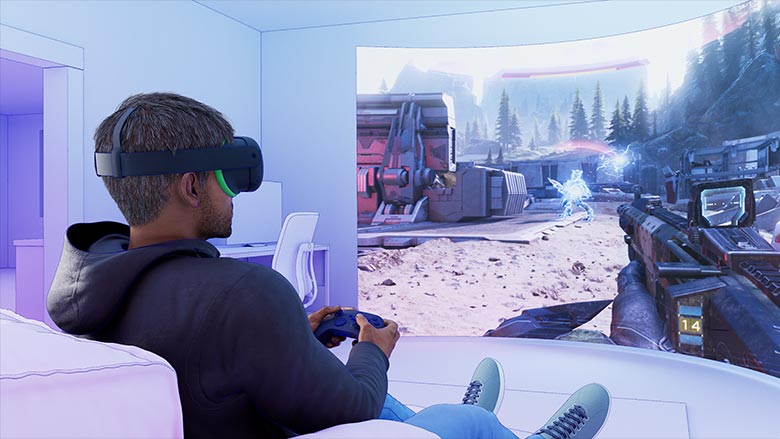
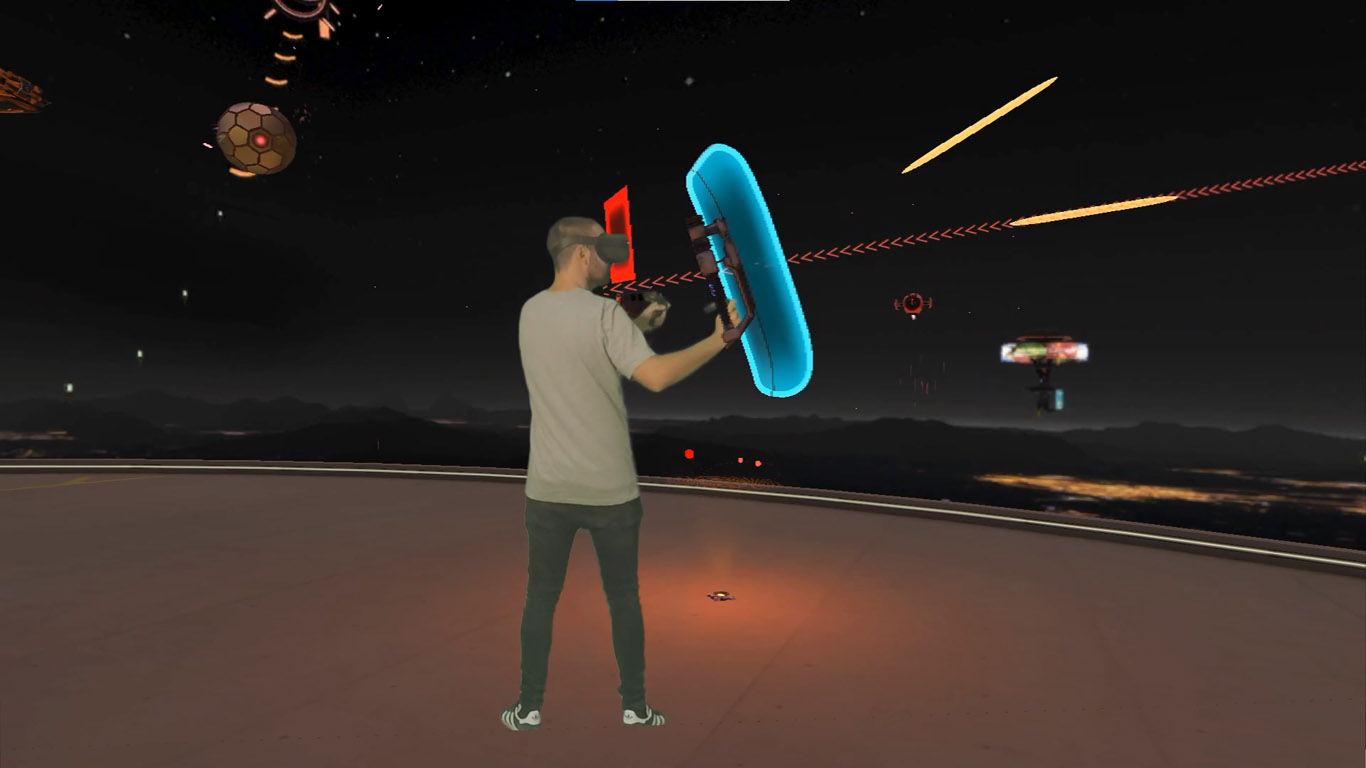
Welcome to this Oculus Quest Mixed Reality Capture Tools tutorial for complete beginners where you will learn how to film engaging mixed reality videos.
In case you don’t know what mixed reality videos are, it’s that kind of videos where you see the real person interacting with the virtual environment.
This tutorial is for you if:
- You want to learn how to film Oculus Store games and apps in mixed reality with your Oculus Quest.
- You want to film wirelessly, without the link cable connecting your Quest and PC.
- You want a clean cut between the person and the background. This is achieved thanks to a green screen, also called chroma key.

This tutorial is not for you if:
- You want to film games from Steam. In this case, you would need a different program called LIV which isn’t explained in this tutorial.
- If you don’t mind using the link cable and want to achieve higher quality, you’d need to check out a LIV tutorial as well.
- If you don’t have a green screen, but you do have an iPhone X or higher or iPad. You can use the iPhone’s depth camera to distinguish between the person and the background. This tutorial doesn’t explain this method either.

What Oculus Store games are compatible with mixed reality?
This is the list of compatible games as of April 2021:
- Audica
- Beat Saber
- Dead & Buried 2
- Gadgeteer
- Kingspray
- Racket Fury
- Real VR Fishing
- Richie’s Plank Experience
- SUPERHOT VR
- Space Pirate Trainer
- Thrill of the Fight
Make sure to check the official Oculus list of compatible games for the most up to date info.
What filming equipment do I need for recording mixed reality videos?
- Oculus Quest 1, Quest 2, or Rift S.
- A powerful computer with an Nvidia 1070 or higher graphics card.
- A webcam connected via USB to the computer (for example a Logitech webcam)
OR a GoPro Camera, a DSLR camera, or a Mirrorless camera connected via HDMI to a capture card (for example ElGato 4K capture card) - A 5GHz router
- A big green screen (at least 6 x 3 meters) that enables you to walk around and capture your whole body.
- Good lighting of the person and the green screen for the best results (softbox lights or LED panels)

What programs do I need for filming mixed reality videos?
First, download Oculus Mixed Reality Capture tools. It’s only available for Windows, sorry Mac users.
Unzip the file and install it.
Then open the program, click on get started, agree and select your headset.
Now you need to add the Oculus MRC app to your account. Click on the “here” link that is in the dialog box (picture here below), which will open your browser and log into your account. Then click on Free on the resulting page to install the application on your Quest.

Now turn on your Oculus Quest, create a big guardian that goes behind your camera and computer. Then go to your Quest library and you will see the Oculus MRC ready to be downloaded.
Download it.
If it says that you need to update the app but it doesn’t update, just uninstall the app and reinstall it again.
Next step is opening the app and you should see your IP address on the top.
Leave the Quest turned on inside the playspace. The default battery settings of the Quest will keep it on for 15 minutes before turning it automatically off.
In order to follow this tutorial successfully, you might want to extend the 15 min to 4 hours. To do so, go to your Quest’s settings, then click Device, then scroll down to Power and finally click Auto Sleep Headset to set up the time.
Besides that, you might want to have your Quest connected to the power and avoid running out of battery.
Leave the MRC app open on your Quest and the device inside the playspace.
Go back to your PC.
In the Windows MRC program, click Search For Device, and the program should find your device automatically. In my case it finds it quickly every time.

If your computer can’t find your Quest, make sure both your computer and Quest are connected to the same 5GHz WIFI network and that the MRC app is open on your Quest.
Once your computer is connected wirelessly to you Quest, click on Calibrate and the program should recognize your camera.
In my case, I use a GoPro.
The GoPro is connected from the Camera Micro HDMI out to an HDMI adapter, from the adapter to the HDMI in of the capture card.
My capture card is an ElGato 4K60 Pro.

If your capture card doesn’t appear on the list, make sure you have all cables well connected and the camera is on. Also, try restarting Windows and check if the capture card drivers are updated.
If you are using a webcam, for example, a Logitech webcam connected via USB, you should see it on the list directly and you won’t need a capture card at all.
In my case, I click on the capture card and then click on begin calibration.
Now you should see through your camera. It’s time to center it on the green screen. The green screen should be big enough that it allows you to walk one step back and forth. The bigger the green screen, the more freedom you will have to move around, obviously.
Don’t worry if the green screen doesn’t cover the whole wall, I will tell you in a minute how to crop the wall away.

Now it’s time to calibrate your controllers. Take your Quest with the left hand and the right controller, match the position of the controller with the image you see on screen and push the trigger. You will need to do this 10 times.
If you don’t have the patience to do it super accurately, you will have the chance to fine tune the calibration afterwards. Beware that if the controller onscreen turns yellow, it means your headset is not tracking the controller.
Once you finish, put the headset and controllers on the ground and fine-tune the calibration from the computer. Mainly you will need to adjust the translation on the X, Y, and Z axes. I usually don’t have to touch the remaining options.

Once you are happy with the calibration click Save To Headset.
Warning: from this point on, you can’t move the camera anymore and you can’t change the angle or the height of the camera. Otherwise, you will need to recalibrate again. Also, very important, don’t change the guardian. If the Quest goes in sleep mode or you turn it off, make sure when turning it on again to be inside the playspace. Make sure your Quest recognizes the same guardian as before and avoid having to recalibrate the camera.
Next step is to click on Generate OBS Scene Collection and save the file where you can find it later.
Afterwards, install the version of OBS that Oculus suggests and install the plugin.
Now open OBS, go to Scene Collection, click Import. Select the file you just saved in the previous step.

Then click again on Scene Collection and you will find your import as Oculus MRC. Further calibration imports will be saved below as Oculus MRC 2, 3, 4 etc…
Now double-click on Video Capture Device and check you can see through your camera. Then right click on Video Capture Device and then Filters. Click on Chroma Key and adjust the similarity until you see in the preview that the system is filtering out completely the green color. The rest of the options are fine in default mode.

Now go to Render Delay. This render delay is useful if you see your controllers moving quicker or slower than your virtual controllers. Do some tests with 75ms, 100ms, 125ms, 150ms, until you see that real controllers and virtual controllers are perfectly aligned at all times, even if you move them quickly.
Close this OBS window, go to the Oculus MRC window and click on Connect to MRC-enabled game running on Quest.
If you see the pop-up message “Connection Failed”, do what the pop-up tells you. Check inside the Quest that the MRC app is running, the IP address you see matches the one in OBS and retry launching.

If you see again the same pop-up error, power off the Quest, turn it on and retry. To avoid this error when changing between Quest apps, make sure to disconnect from Quest on OBS, change the app on the Quest and connect again.
By now you should see through your camera and your green screen should look grey.
Now do a single click on Video Capture device. Then on your keyboard press and hold ALT and at the same time use your mouse to drag the red dots on the screen. That should crop away the parts not covered by the chroma.

When playing, make sure you stay in the chroma area, otherwise your hand will be cut.
If the calibration of your controllers is not accurate anymore, because your guardian changed slightly or you moved the camera, you will need to do open again windows MRC tool, do a quick recalibration, and import into OBS the new settings in a new scene collection.
One last tip: you can rotate the playspace and film the game for example from the front, from the back, and from the side. With the Quest on, press and hold the Oculus button of your right controller and point your head in the direction you want your playspace to be oriented.
Now you are ready to capture mixed reality video, YAY! Congrats!
But I have bad news for you, you will be capturing only video, not the audio. The sound of the game can’t be sent wirelessly. But don’t panic, I have you covered.
In order to capture the sound as well you have 2 different options:
First option: record the Oculus Quest screen within the headset, and then in post-production match the sound with your video editing software.

Second option: connect to the 3.5 mm jack of your Quest a recording device.
I personally use the first option if I don’t see frames dropping.
In case you are a VR developer who needs a promotional mixed reality video of your game or app, but you don’t have time to learn this process. Or maybe you don’t have space in your office to film the video or you don’t want to invest in all the equipment for just one video – I can help you!
My name is Alex Gonzalez, and I am a freelance mixed reality video producer specialized in creating highly engaging marketing videos of VR games and apps. My team and I have recorded 30+ videos for VR start-ups like yours. Learn more about my services, portfolio of videos and pricing on my website. Thanks!
That’s it! Hope you enjoyed this tutorial and everything was clear, if you get stuck in the process let me know in the comments and I will help you out.
Thanks for your attention! Happy mixed reality filming!
Cheers,
Alex
Disclaimer: this blog contains advertisement and affiliate links to sustain itself. If you click on an affiliate link, I'll be very happy because I'll earn a small commission on your purchase. You can find my boring full disclosure here.