
If you've contemplated what's possible with augmented reality on mobile devices, and your interest has been piqued enough to start building your own Android-based AR app, then this is a great place to to acquire the basic beginner skills to complete it. Once we get everything installed, we'll create a simple project that allows us to detect surfaces and place custom objects on those surfaces.
For months now, between ARKit and ARCore, we at Next Reality have seen and posted experience after experience, use-case after use-case, showcasing the competing mobile AR toolsets at their best. Games, retail shopping experiences, in-store navigation, marketing apps, utility tools, and even a few undefinable experiences have all been seen in various forms.
The sheer excitement and creativity that comes along with such a new form of interaction is exhilarating, and that's exactly what inspired this new ARCore series. But before we can get into the fun stuff, we need to get the setup out of the way. In this first part, we will get our software installed and get a basic project started.
Step 1: Make Sure You Have a Compatible Phone
Before you get too far, remember that you'll need a compatible device to test your app on. Fortunately, with ARCore leaving preview and moving to a release version, Google has opened up the number of devices that are compatible with ARCore. Some of the devices include but are not limited to the Google Pixel, Pixel 2, Samsung Galaxy S7, Galaxy S8, Galaxy Note8, OnePlus 5, and Huawei P20.
Step 2: Download All the Software
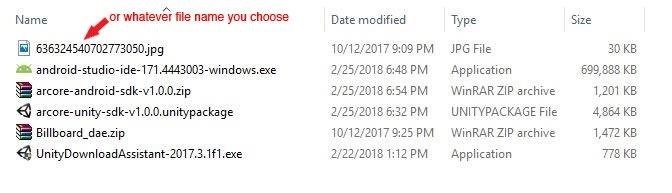
Now, for the software that you'll need. Since we have a number of things to download for this series, I recommend downloading everything to a single directory to make it easy to access. Here's what you'll need:
- Download Unity 2017.3 ("2017.3"or higher is needed to work with the first official version of ARCore).
- Download and install Android Studio 3.0 or higher, as it is the easiest way to get the Android SDK installed. And make sure that the version of the SDK you choose in the installation process is Android SDK version 7.0 (API Level 24) or higher.
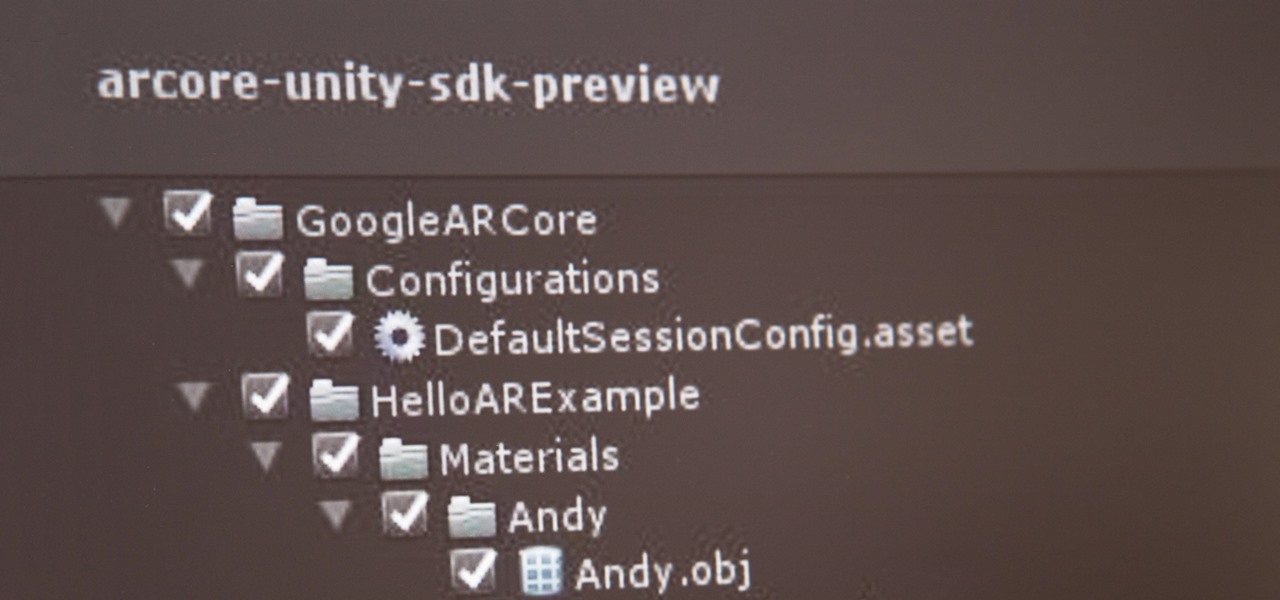
- Download the "arcore-unity-sdk-v1.0.0.unitypackage."
- Download the Sample Assets arcore-intro.unitypackage.
- Right-click on the picture below, and choose "Save Image As," give it a name, and download the image.

- Finally, download the free billboard model from TurboSquid. When offered the option, download the Collada version with the "DAE" extension. (Note that the FBX version of the file will work as well, I've just found that, in some cases, the DAE version has worked with fewer problems.)
Hopefully, once everything is downloaded, you will have a directory that looks like the screenshot below. The key to easy developing is staying organized!
Step 3: Install Unity
When we install Unity, we need to make sure we have the options that will be used for ARCore development installed during that process. There are a few options that are not default choices, so be careful.
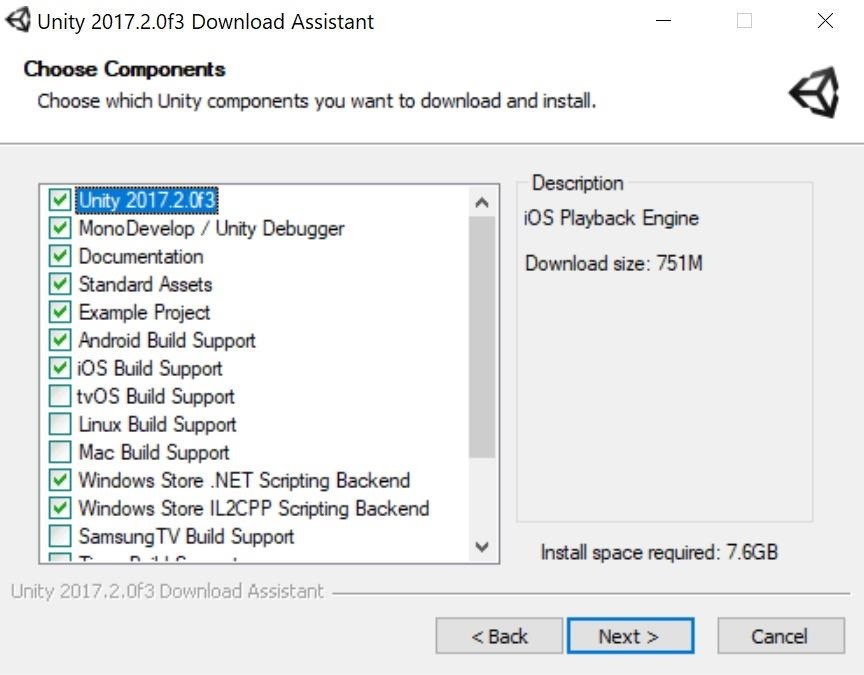
Go to the place that you downloaded all of the files for this project and double-click on the "UnityDownloadAssistant-2017.3" file. Move forward in the install process until you reach the Choose Components window. Now, make sure "Unity 2017.3.1f1" (or whichever version of 2017.3 you are installing) is selected, as well as "Android Build Support."
For the purposes of this tutorial series, everything else in the list (see image below) is superfluous, but if you want to use this software to develop for other platforms, select them from the list as well. Once all of the options are selected that you need, click the "Next" button.
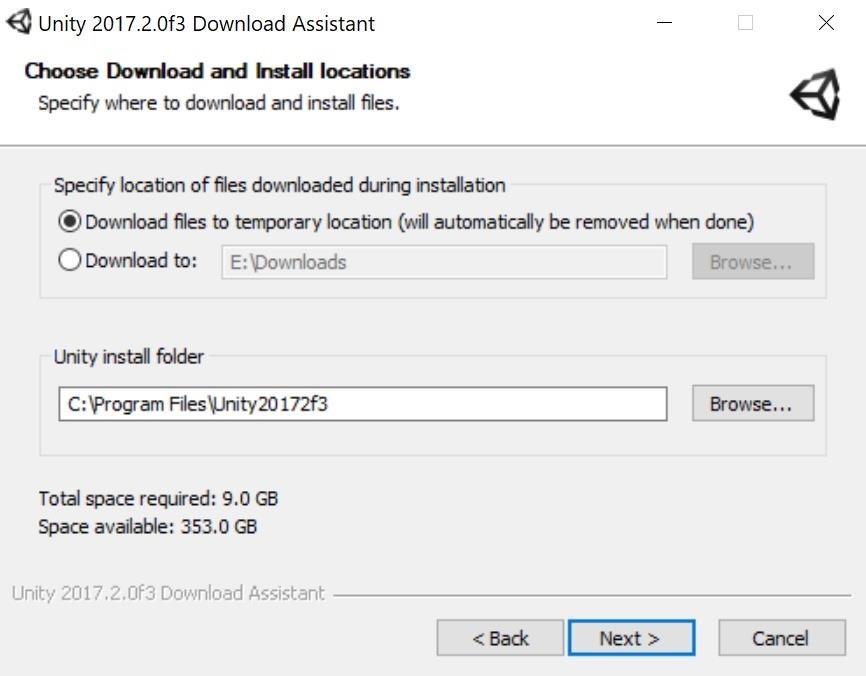
If you are a frequent Unity user, with a number of different versions installed, you may want to use a folder other than the default. Alternatively, you can use a name other than just "Unity." Either way, once that decision is made and the folder name is added to the Unity install folder field, click the "Next" button and the installation process will begin.
Pro Tip: Unity users with a bunch of versions installed can also check out a tool that Unity recently released called the Unity Hub, which helps you keep up with projects and the different versions of Unity for those specific projects (it can become confusing remembering which project uses which version of Unity, so this can be a helpful tool).
If this is your first time using Unity, go ahead and run the application and create a new account to get logged in.
Step 4: Create Your ARCore Project
Now we will create a fresh project and set up the ARCore specifics we need to get our project up and running. The process that is described throughout the rest of the steps in this lesson will be the same anytime you want to start a new ARCore project, so you might want to bookmark this page for future reference.
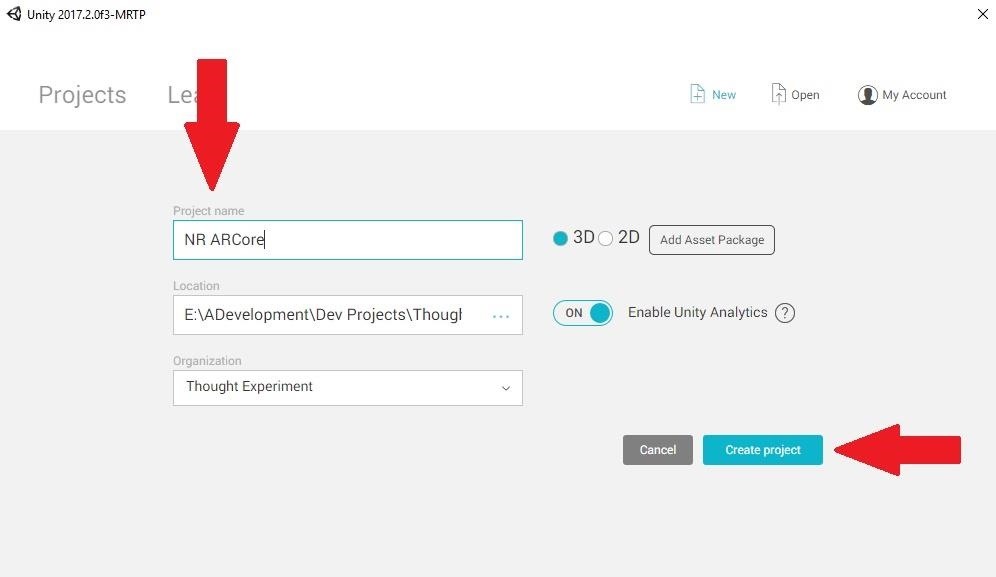
Run the Unity application, and click on the "New" button. Name the new project NR ARCore, or something meaningful to you, and then click the "Create project" button.
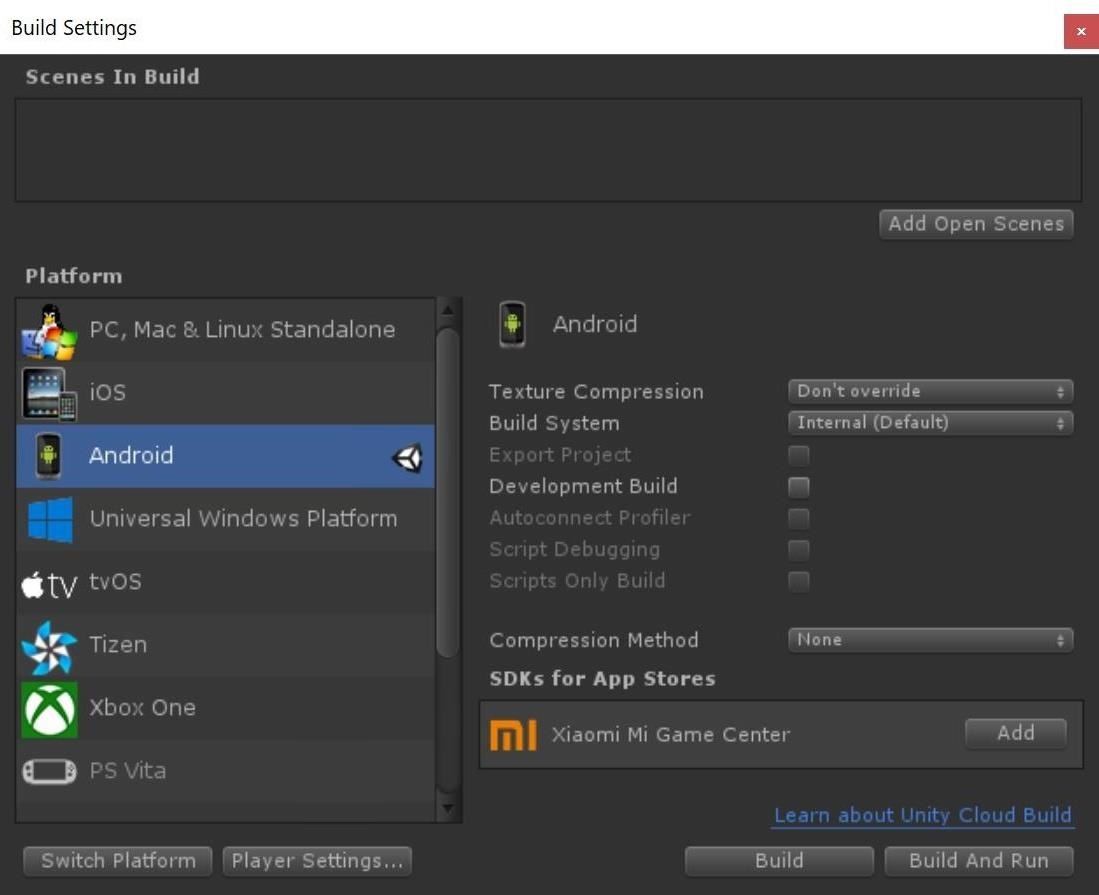
Once the main Unity window opens, either press Ctrl + Shift + B or click on "File", then "Build Settings" to open the Build Settings window. From there, click on the "Android" option under Platform, then click on the "Switch Platform" button. When the Unity logo appears next to the Android option, you know you have it selected. Click on the "Player Settings" button to proceed.
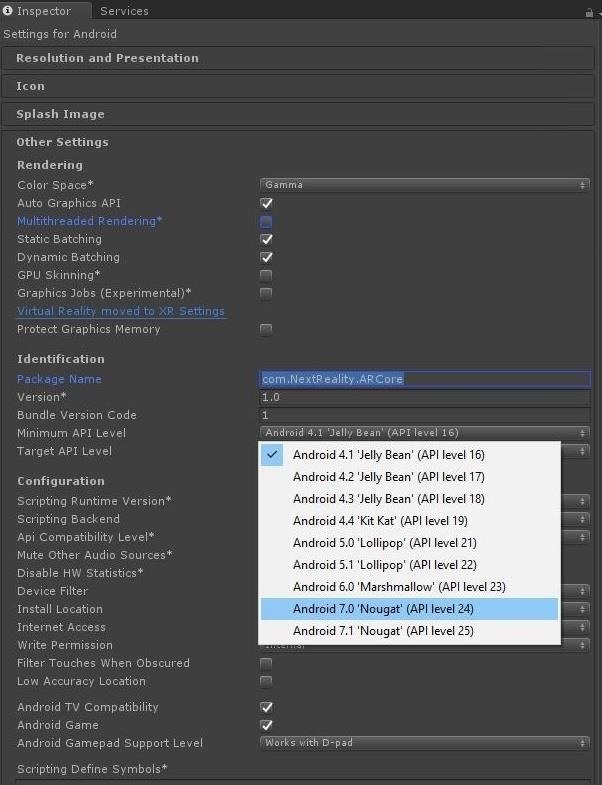
Looking in the "Inspector" tab, under the Other Settings heading, click on the "Multithreaded Rendering" checkbox to make sure it is not selected.
In the "Package Name" field, type com.NextReality.ARCore or something using the com.CompanyName.App format. It just needs to be unique to your device, as it can cause problems if it has the same package name as another application.
Now, we need to set the lowest compatible version of the Android OS that is compatible with ARCore. Find the "Minimum API Level" option, click on its drop-down menu, and select "Android 7.0 'Nougat' (API Level 24)." As this option implies, this app, just like ARCore, will not work with versions of Android before Nougat.
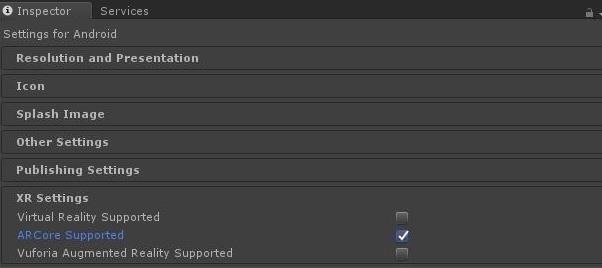
Click on the "XR Settings" down at the bottom of the Inspector window. Check the "ARCore Supported" checkbox to make sure it is selected, then exit these settings.
Step 5: Add the ARCore SDK & Assets
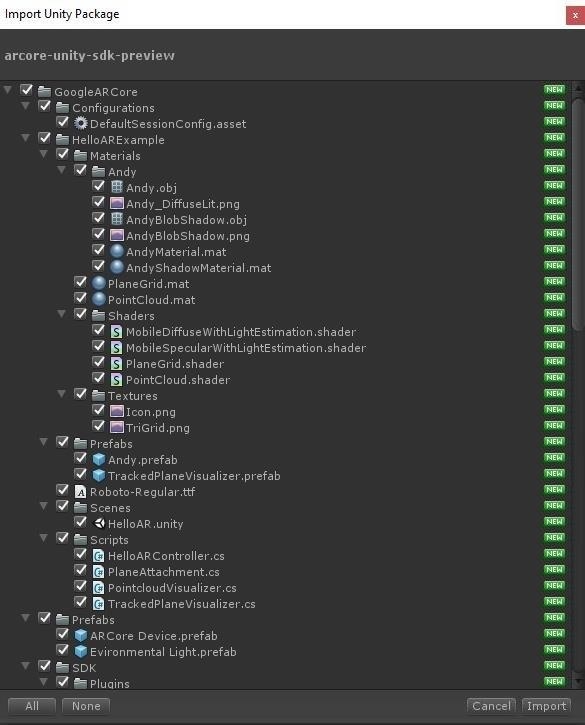
Finally, to complete this first tutorial, we need to import our ARKit elements into our scene. Double-click on the "arcore-unity-sdk-v1.0.0.unitypackage" file.
This will bring up the Import Unity Package window. Simply click on the "Import" button. We don't need to deselect anything in this list, just keep it as is.
Alright, that's it. With software setup out of the way, in the next tutorial in this series, we will get our scene set up and get our app framework to a point that we can see it function on our device. Stay tuned!
Just updated your iPhone? You'll find new emoji, enhanced security, podcast transcripts, Apple Cash virtual numbers, and other useful features. There are even new additions hidden within Safari. Find out what's new and changed on your iPhone with the iOS 17.4 update.


Be the First to Comment
Share Your Thoughts