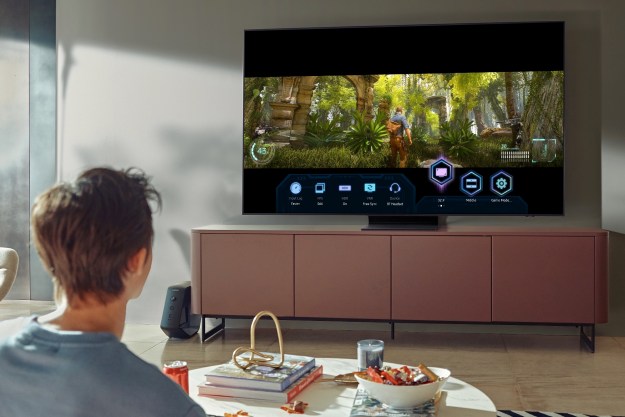
The advent of 4K UHD resolution has been a significant boon to gaming, as it has brought crisper resolutions and more exquisite detail to graphics. However, while 4K is an appreciable upgrade, if you’re not playing with high-dynamic range (HDR) enabled, you’re not getting the full experience from your 4K TV or games. Both of Sony’s current consoles — the PlayStation 4 and the 4K-ready PS4 Pro — support HDR, provided you have the proper display and the right setup. We’ve put together this guide on how to set up HDR gaming on your 4K/HDR TV and PS4 or PS4 Pro consoles for more colorful, vibrant games.
Note that while both the PS4 and PS4 Pro are capable of HDR, you’ll need to make sure you’ve updated the firmware to 4.0 or higher. If you need help setting up HDR on an Xbox One S or Xbox One X, we can help with that, too.
Set up your TV first
Step 1: Make sure your console is connected to an HDMI 2.0a/HDCP 2.2-compliant port on your TV. You might think that because you have a 4K/HDR TV, all ports would be usable, but in most cases, only one or two ports are HDMI 2.0a/HDCP 2.2-enabled. What is more surprising is that the compatible HDMI port you need is not necessarily HDMI 1. Sometimes TV manufacturers label the ports so that you know by looking, but even those labels can be misleading. To be sure, check out the specs section for your TV’s model at the manufacturer’s website to determine which HDMI ports support HDMI 2.0a, and use one of those for your console.
Step 2: Open your TV’s Settings menu. Head to the Picture Settings section, then look at the presets to find your TV’s Game Mode. This mode will cut down on picture processing, and your picture quality may appear to take a slight hit in the process (don’t worry, we’ll fix that). It will also reduce input lag, so if you’re a competitive gamer, using Game Mode will keep you competitive in multiplayer matchups. If you typically play single-player games (or if you value graphics and picture quality over performance), go ahead and pick whichever preset suits your eyeballs best — we usually prefer movie, cinema, or standard modes.
Step 3: Next, you need to enable HDR on your television. Go back to the Picture Settings menu. From here, it depends on what type of TV you have. Some TVs have HDR settings right in the main Picture Settings menu, while others will list them under Input Settings, Advanced Picture Settings, or even the Main Options menu. You’re looking for a setting like HDMI HDR, HDMI Color Subsampling, HDMI HD Ultra Deep Color, HDMI UHD Color 10-Bit Color, or something similar. You need to enable (turn on) this setting for the HDMI port where the console is plugged in. If you’re not sure where to locate your TV’s HDMI HDR settings, consult your user manual or check the manufacturer’s website. Some TVs will enable HDR automatically as soon as they detect an HDR signal — LG’s OLED 4K TVs are an example — along with HDR-enabled games once they discover a compatible console/TV setup.
Step 4: Your TV can now accept HDR content from your game console, but you may want to fine-tune the picture quality. We suggest adjusting brightness and contrast controls to taste, but before you start tweaking these settings, you want your TV to be displaying some kind of HDR content. This content could be an HDR game for your console or a movie or TV title in HDR via Netflix, Amazon, or Vudu.
Once you’re playing HDR content of some sort (many TVs confirm this by showing an HDR logo on the screen), your TV will be in HDR mode. At this point, go into the Picture Settings to make adjustments. While making adjustments in this mode, you are adjusting picture quality only for the TV’s HDR mode.
As such, this will not impact picture quality settings for those times you are watching standard dynamic range (SDR) content, be that a non-HDR movie on Netflix, a Blu-ray disc, or traditional broadcasts. One thing to note: Some TVs will limit the available settings within HDR mode, like brightness. If this is the case for your TV, try the various presets for HDR and see which one you like the most.
In the market for a new TV? We can help! Take a look at our picks for the best TVs right now or check out our 4K TV buying guide for more info.
Set up your PS4 or PS4 Pro

Once your TV is set up, you’re most of the way there. All that’s left to do is enable HDR on the console. While the PS4 and PS4 Pro will usually auto-detect that HDR is enabled on your TV and adjust the settings itself, it doesn’t always, and it’s a good idea to double-check regardless. Here’s how to do it.
Step 1: After you’ve correctly plugged the console into your TV, turn it on and navigate to the Settings screen. In the System Information tab, make sure Enable HDCP is checked.
Step 2: Next, open the Sound and Screen > Video Output Settings > HDR Option, then toggle Deep Color Output to Automatic.
If you followed the above step correctly, you should now be able to play in HDR, and many new releases activate HDR automatically when connected to a 4K TV. Should you need further help, consult Sony’s video guide.
Finding the right content

Finally, you’ll need to have the right content to play or watch.
There is a long list of HDR-enabled video games on the PS4, and more are being released all the time. Plus, there is a plethora of HDR video content you can access on Netflix, YouTube, and Amazon Prime.
Here’s a quick selection of some HDR-ready PS4 recommendations:
- Horizon Zero Dawn (pictured above)
- Final Fantasy XV
- Deus Ex: Mankind Divided
- The Last of Us Part II
- The Last Guardian
- Uncharted 4
- Ghost of Tsushima
- Red Dead Redemption 2
Make sure the picture looks great
After you’ve set your HDR system up, you might have to troubleshoot the occasional performance issue that presents itself during gameplay. An example of such a problem could be a fuzzy or pixelated resolution.
Unfortunately, not all TVs are suited for HDR, even if it claims to be. A TV needs to be able to achieve high-contrast ratios and expanded color to display HDR properly. Suppose you experience lousy picture quality on your TV despite troubleshooting and adjusting your settings to their highest standard output quality. In that case, you will know that your TV doesn’t have the required high contrast ratios or expanded color properties for HDR picture.
You can also try adjusting the picture quality in the game’s menu if released after firmware 4.0. If that doesn’t help either, we suggest you disable HDR and play in standard mode. Choosing SDR mode should drastically improve the picture quality, and if it does, we recommend it as a go-to default option. Should you need to perform a factory reset on your PS4, check out our handy guide.
Editors' Recommendations
- Best Walmart TV deals: 43-inch 4K TV for $195 and more
- Samsung’s new 98-inch DU9000 4K TV is just $4,000. Can it beat TCL and Hisense?
- Best TCL TV deals: 4K TVs as low as $150
- Vizio’s first 86-inch 4K TV is coming soon, for $999
- Best Apple TV deals: Save on the Apple TV 4K and more